

VoyagerRF
A WiFi Devboard based on ESP32 for Flipper Zero.
Related tools
Page index
Intro
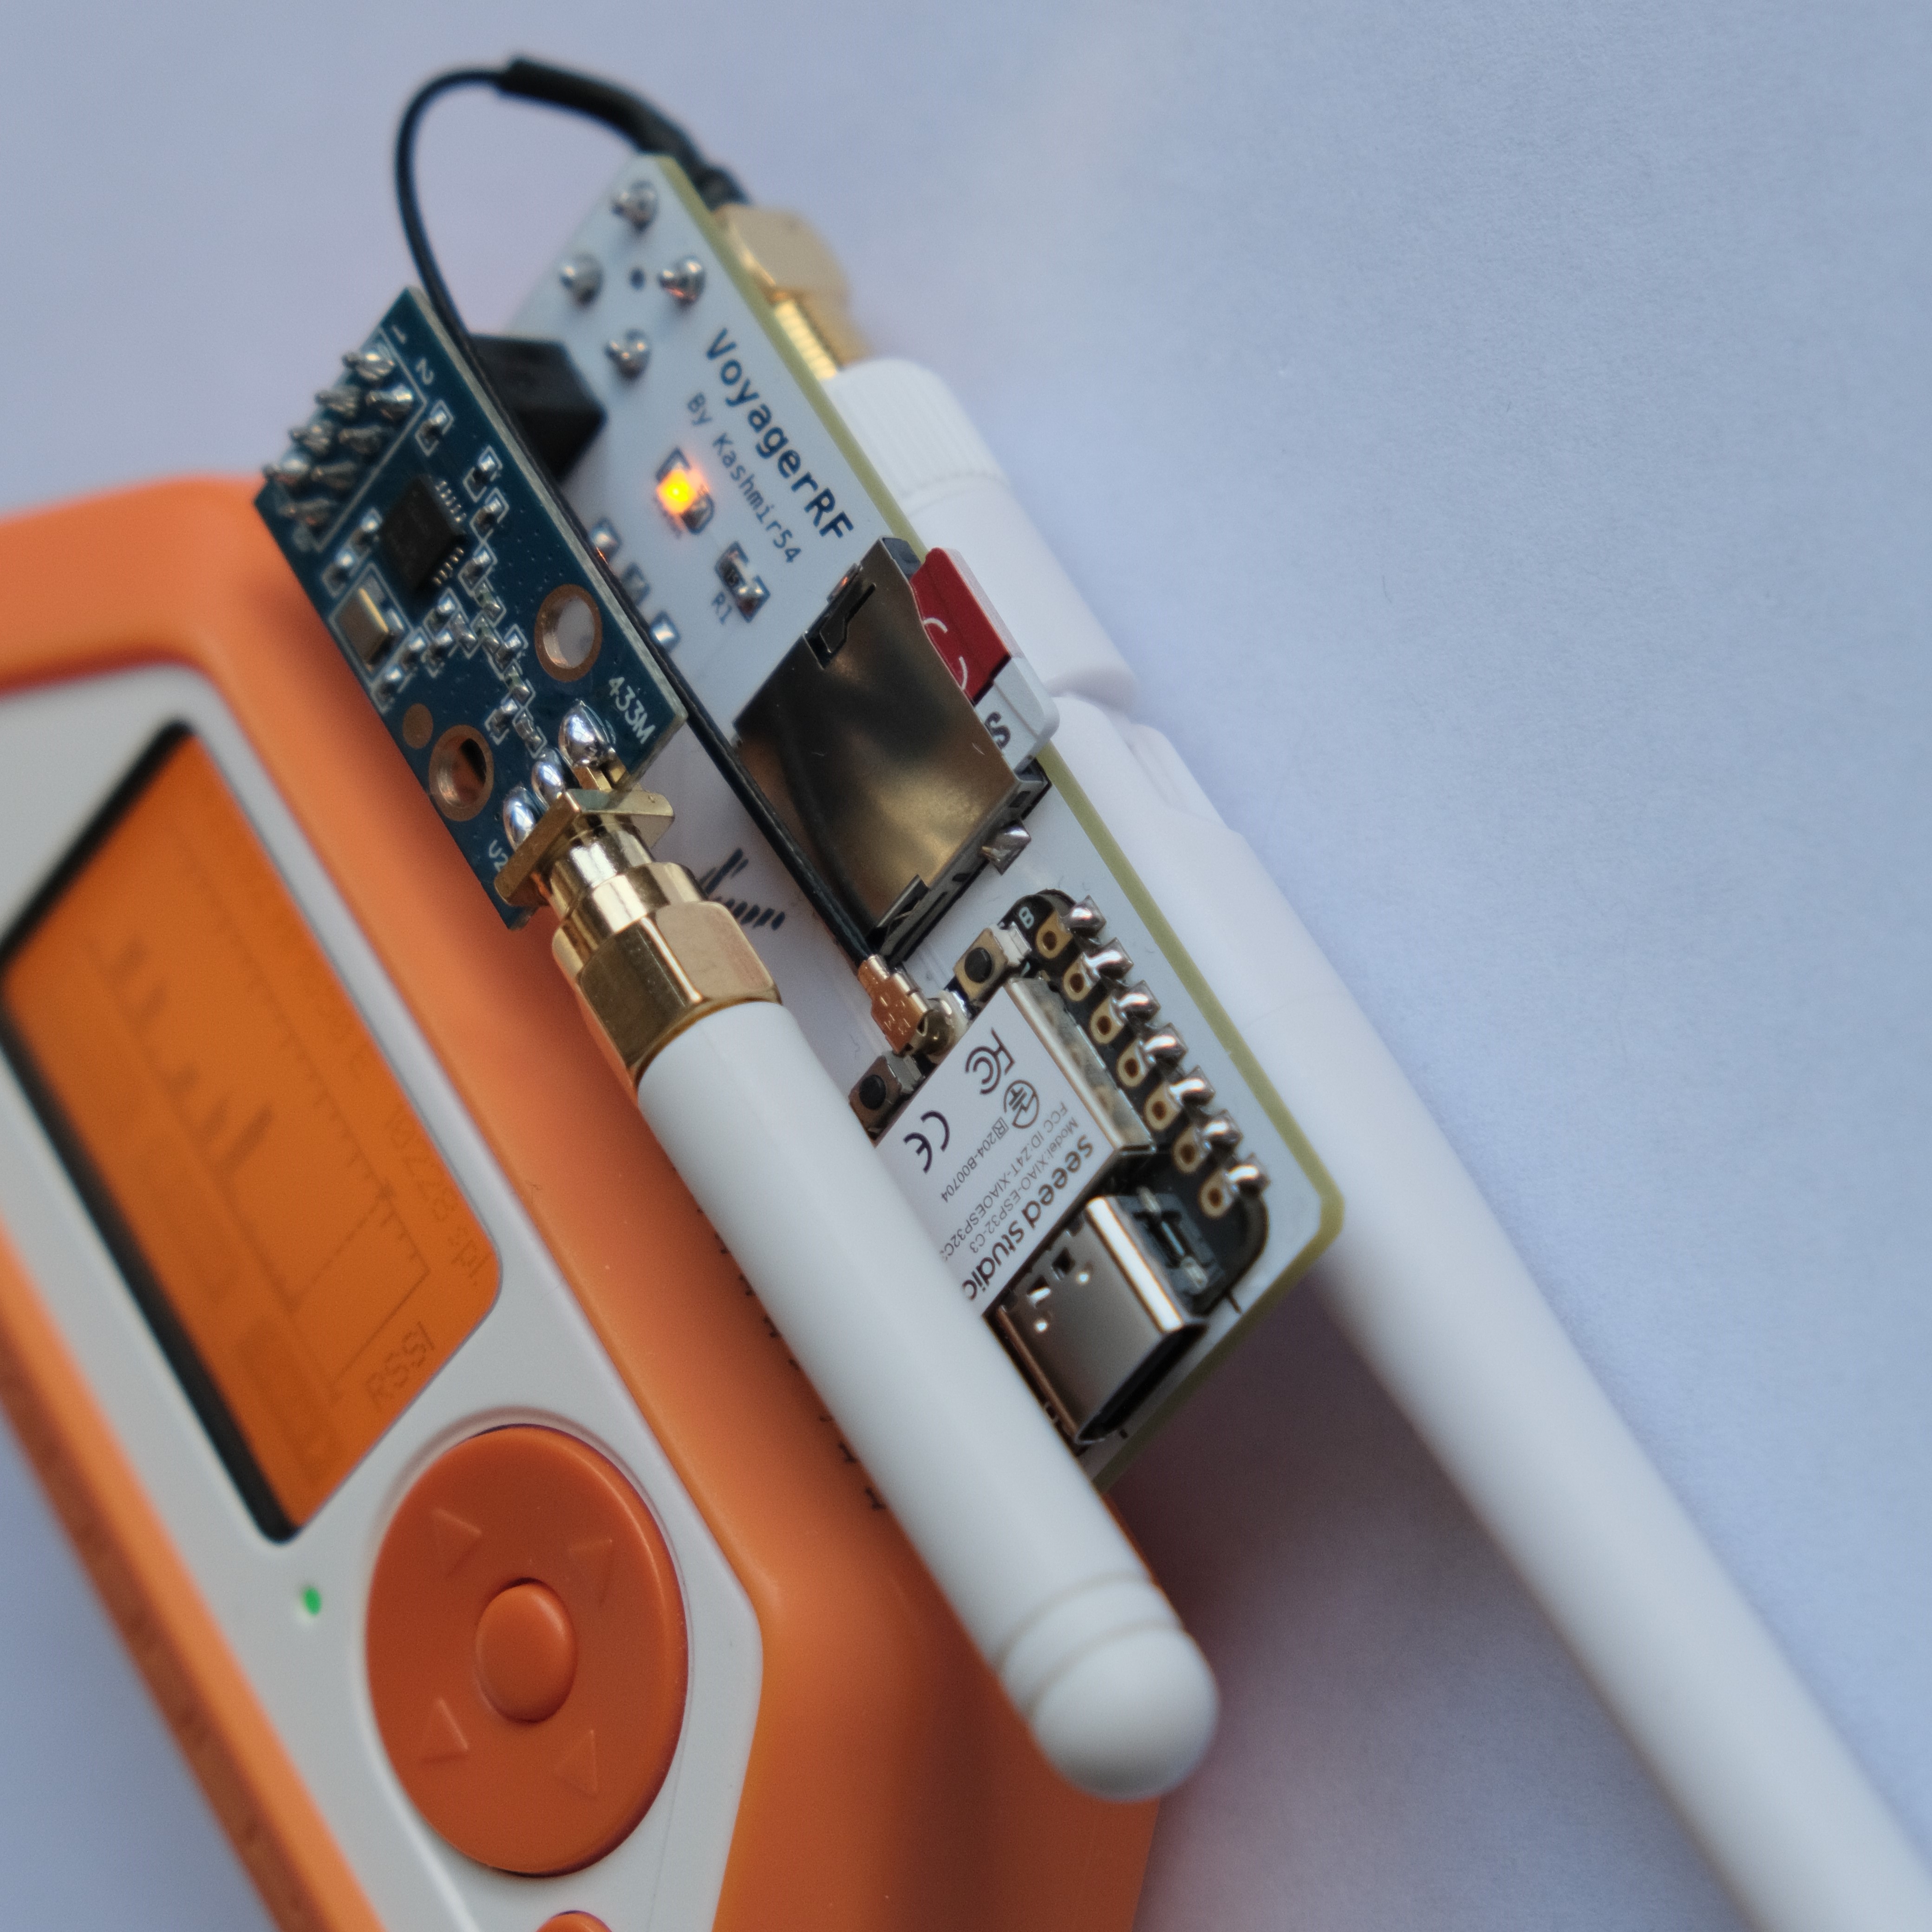
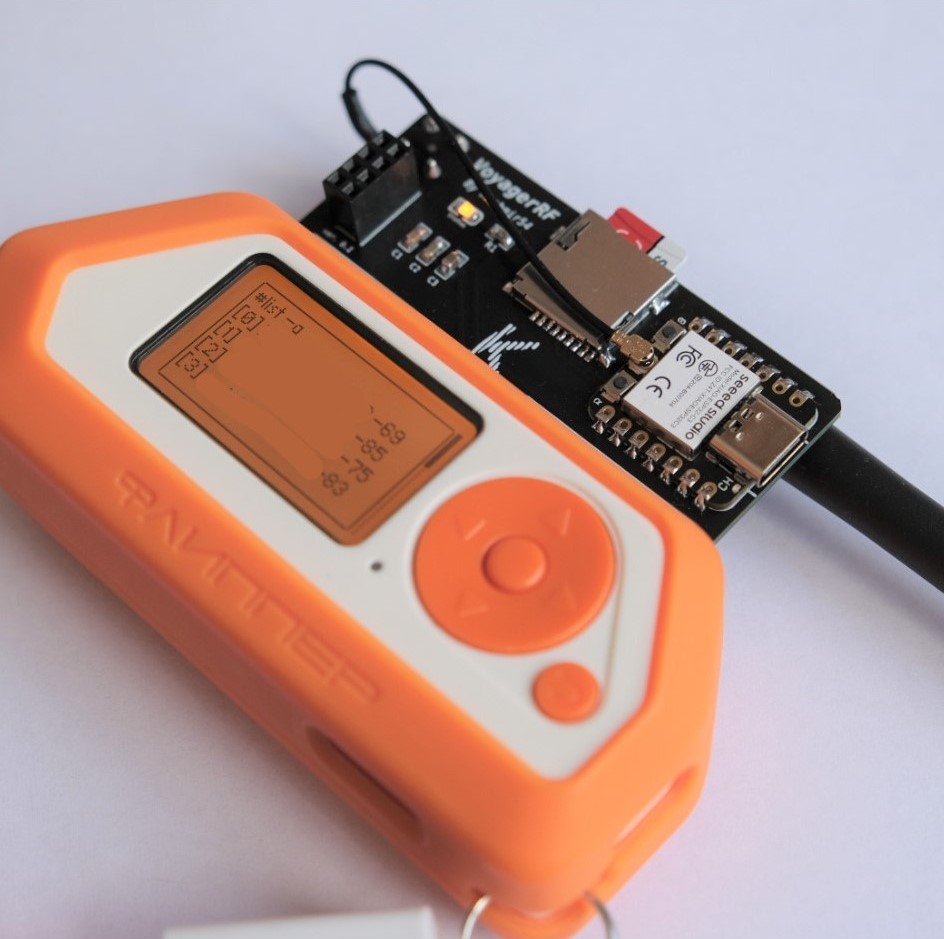
After working on the NRF24 board and checking the range improvement of the external CC1101 with the antenna, I wondered if I can also enhance the WiFi dev module in terms of range, size, and functionality. After hours of design, programming, and research, I produced the VoyagerRF, a multipurpose board with several interesting features such as:
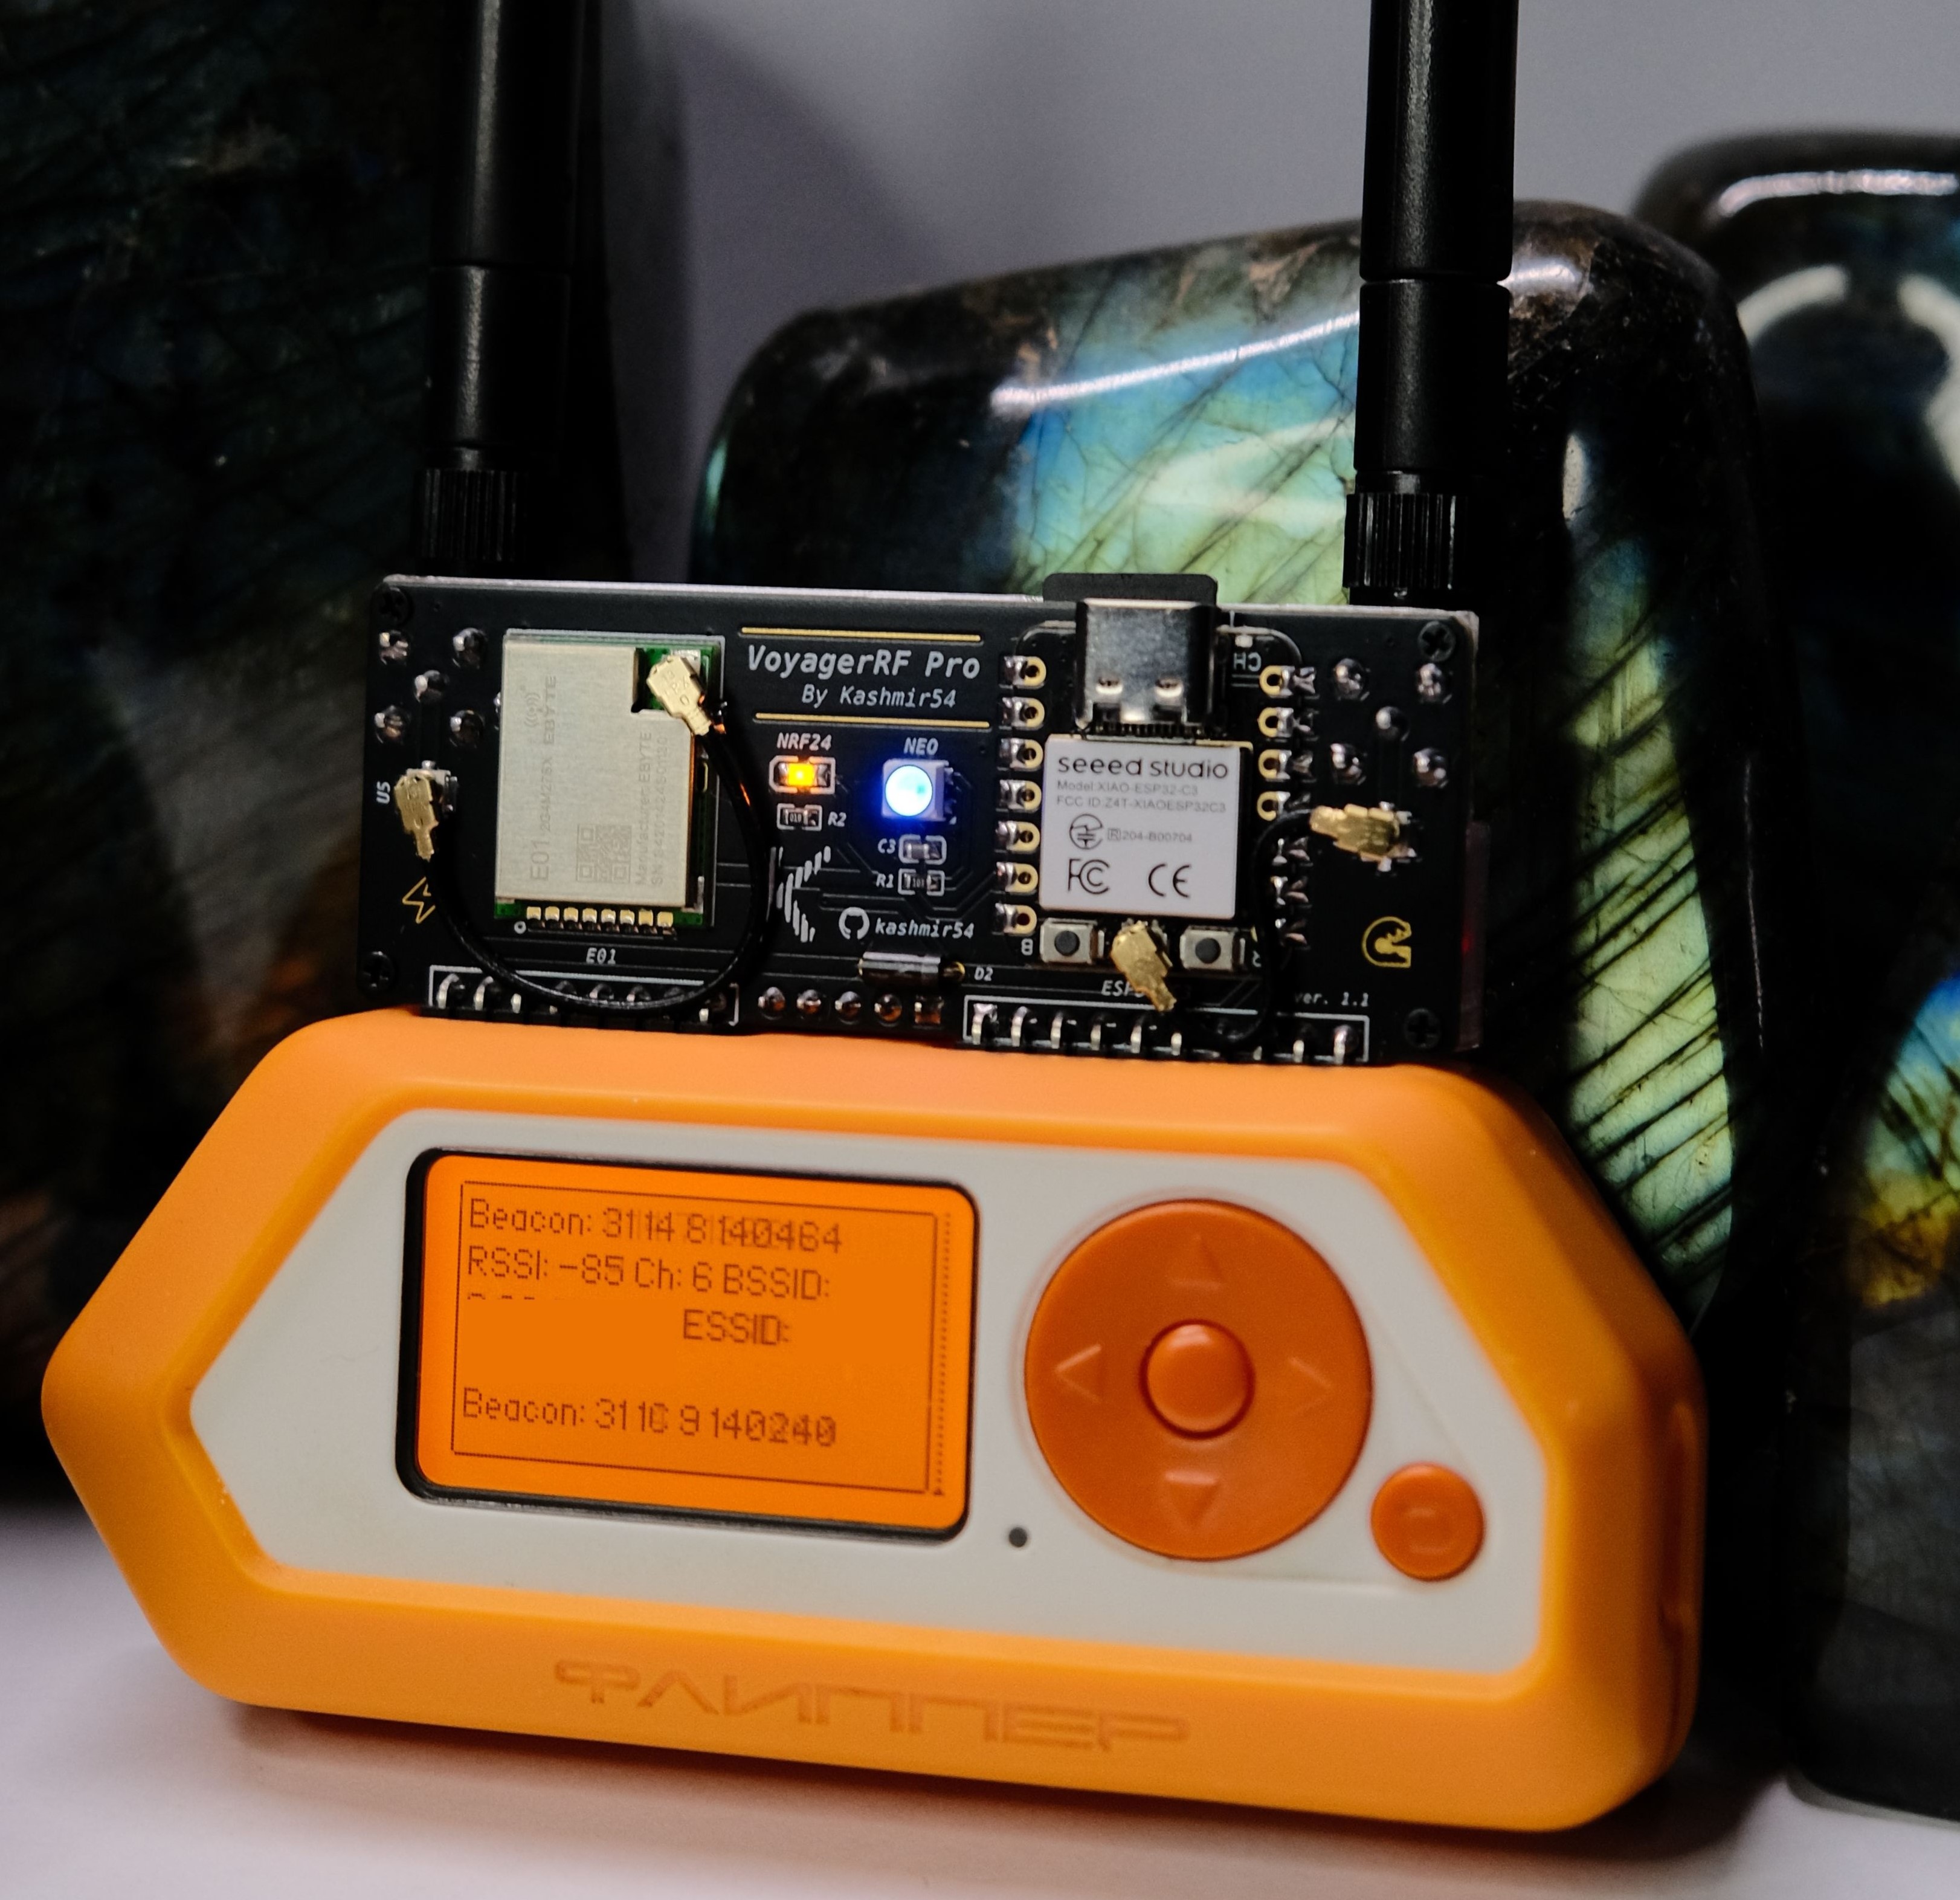
- ESP32-C3: A low-consumption WiFi and Bluetooth chip with the latest Marauder/Ghost_ESP firmware. This chip will allow you to perform all WiFi and Bluetooth tools deployed on Marauder/Ghost_ESP (including evilportal, sour apple, etc). Ready to plug and play and control it with the ESP32 WiFi Marauder GPIO app.
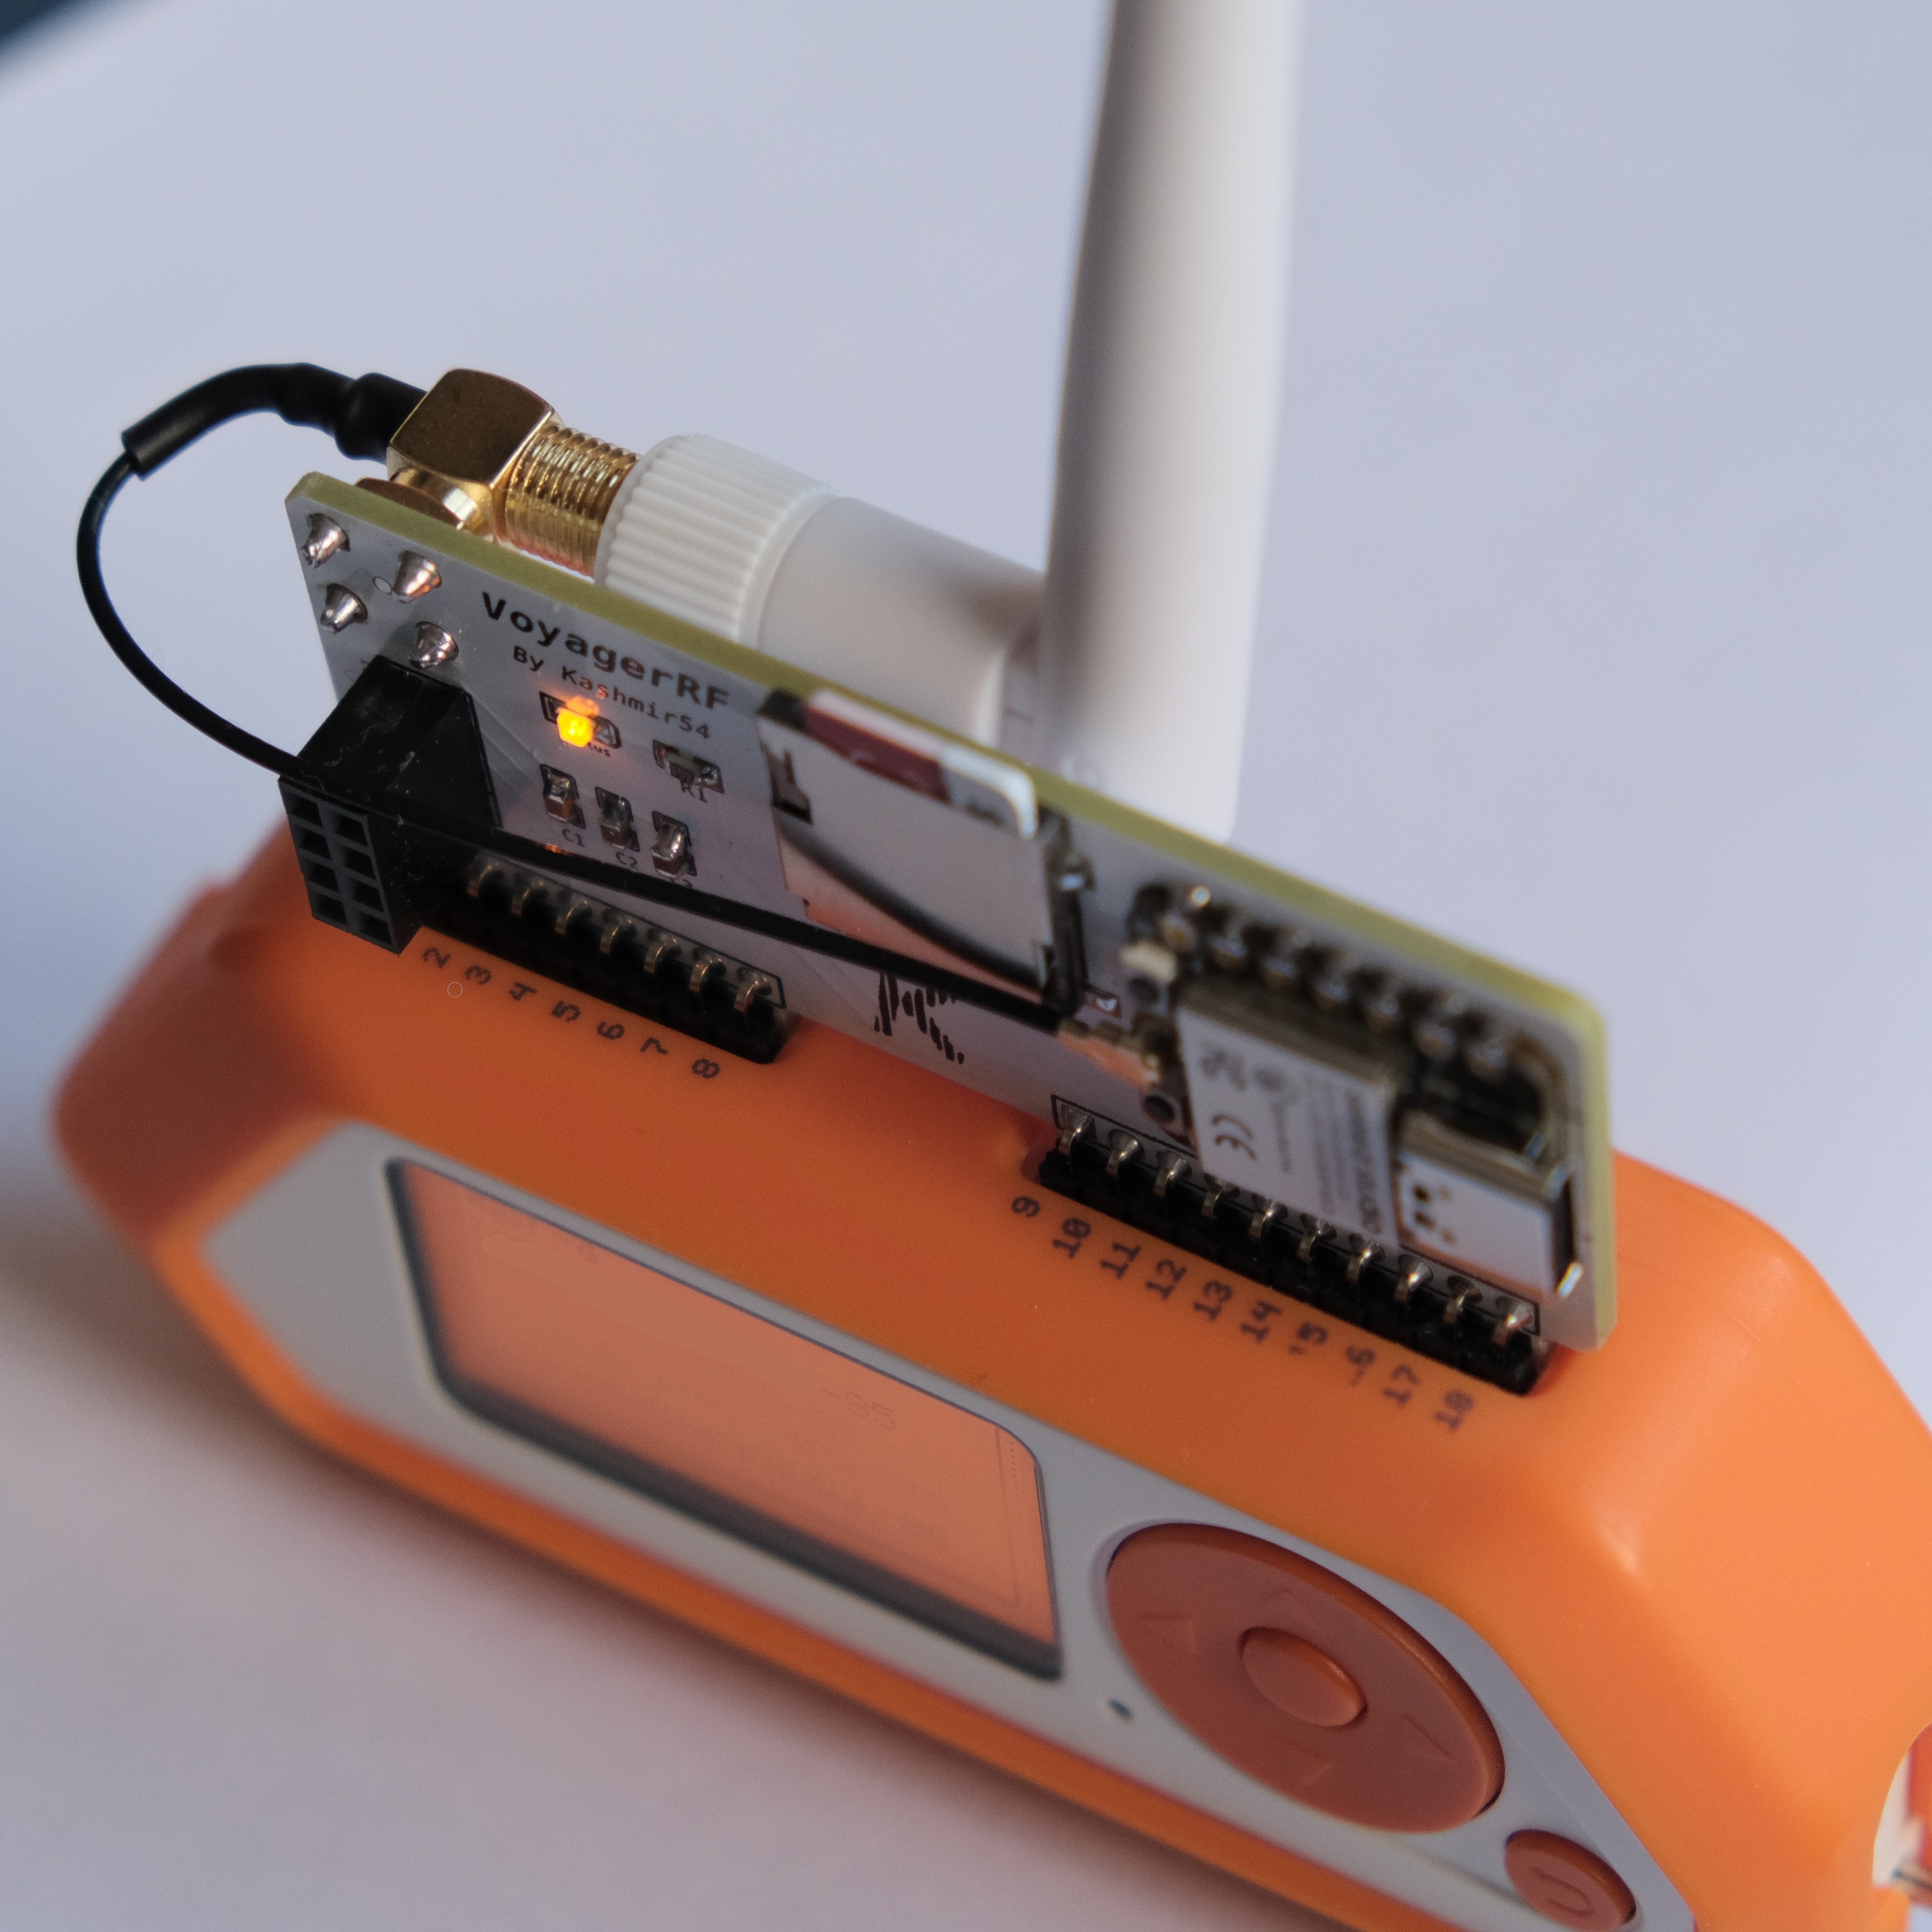
- 3dBi Omnidirectional WiFi antenna (2.4GHz) mounted into the board and connected to the ESP32-C3 for great range improvement against the original devboard.
- MicroSD card slot to save the output from the Marauder/Ghost_ESP app (already configured in the firmware) and different configuration files (for evilportal, for example).
- NRF24/CC1101 socket with decoupling capacitors for noise reduction. Compatible with External CC1101 configuration and NRF24 Sniffer/MouseJacker (see chip compatibility since not all chips have the same pinout).
- Compact design
I wanna give a big shoutout to justcallmekoko for the amazing community he is building and for the developement and maintenance of the marauder project. Make sure you check out his YouTube channel.
I have some units in stock. If you are interested in getting the board and other accessories, you can contact me. Check out the last section to see bundles and prices.
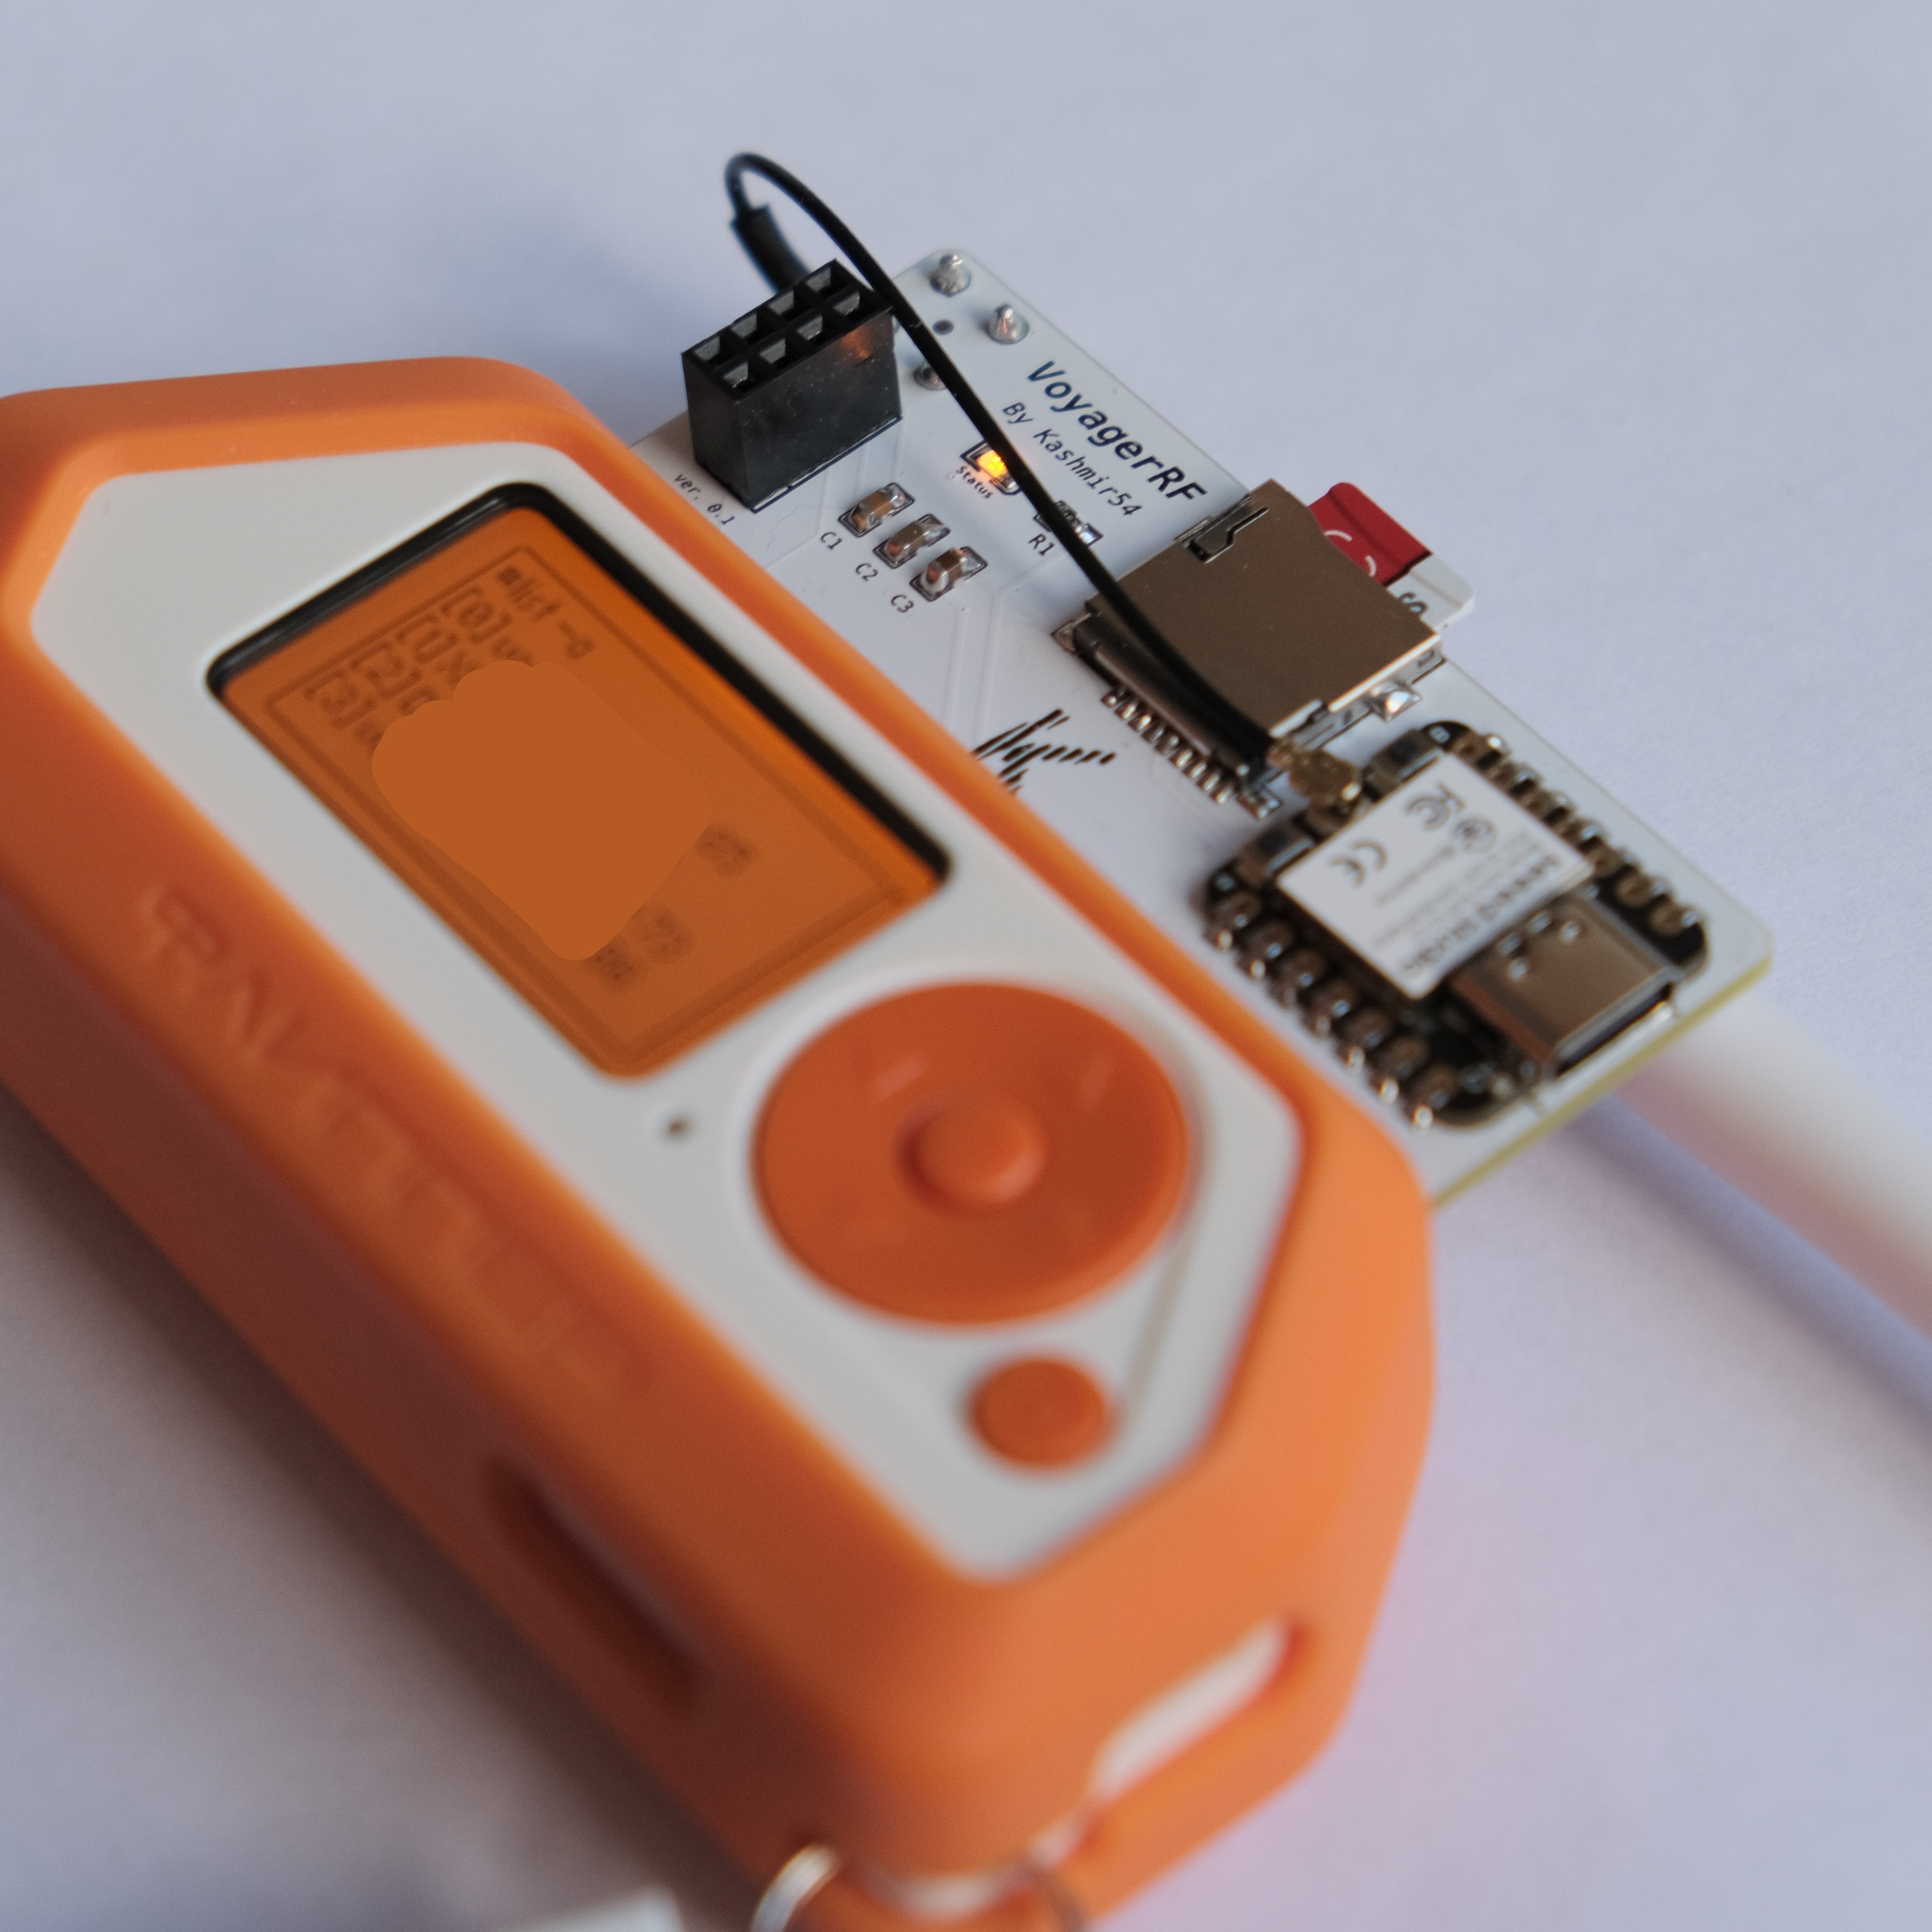
Here you have more photos (also in black matte!):
Bundles and Boards
If you are interested in getting the board and other accessories, you can contact me on my email kashmir_54@hotmail.com and I will get back to you!
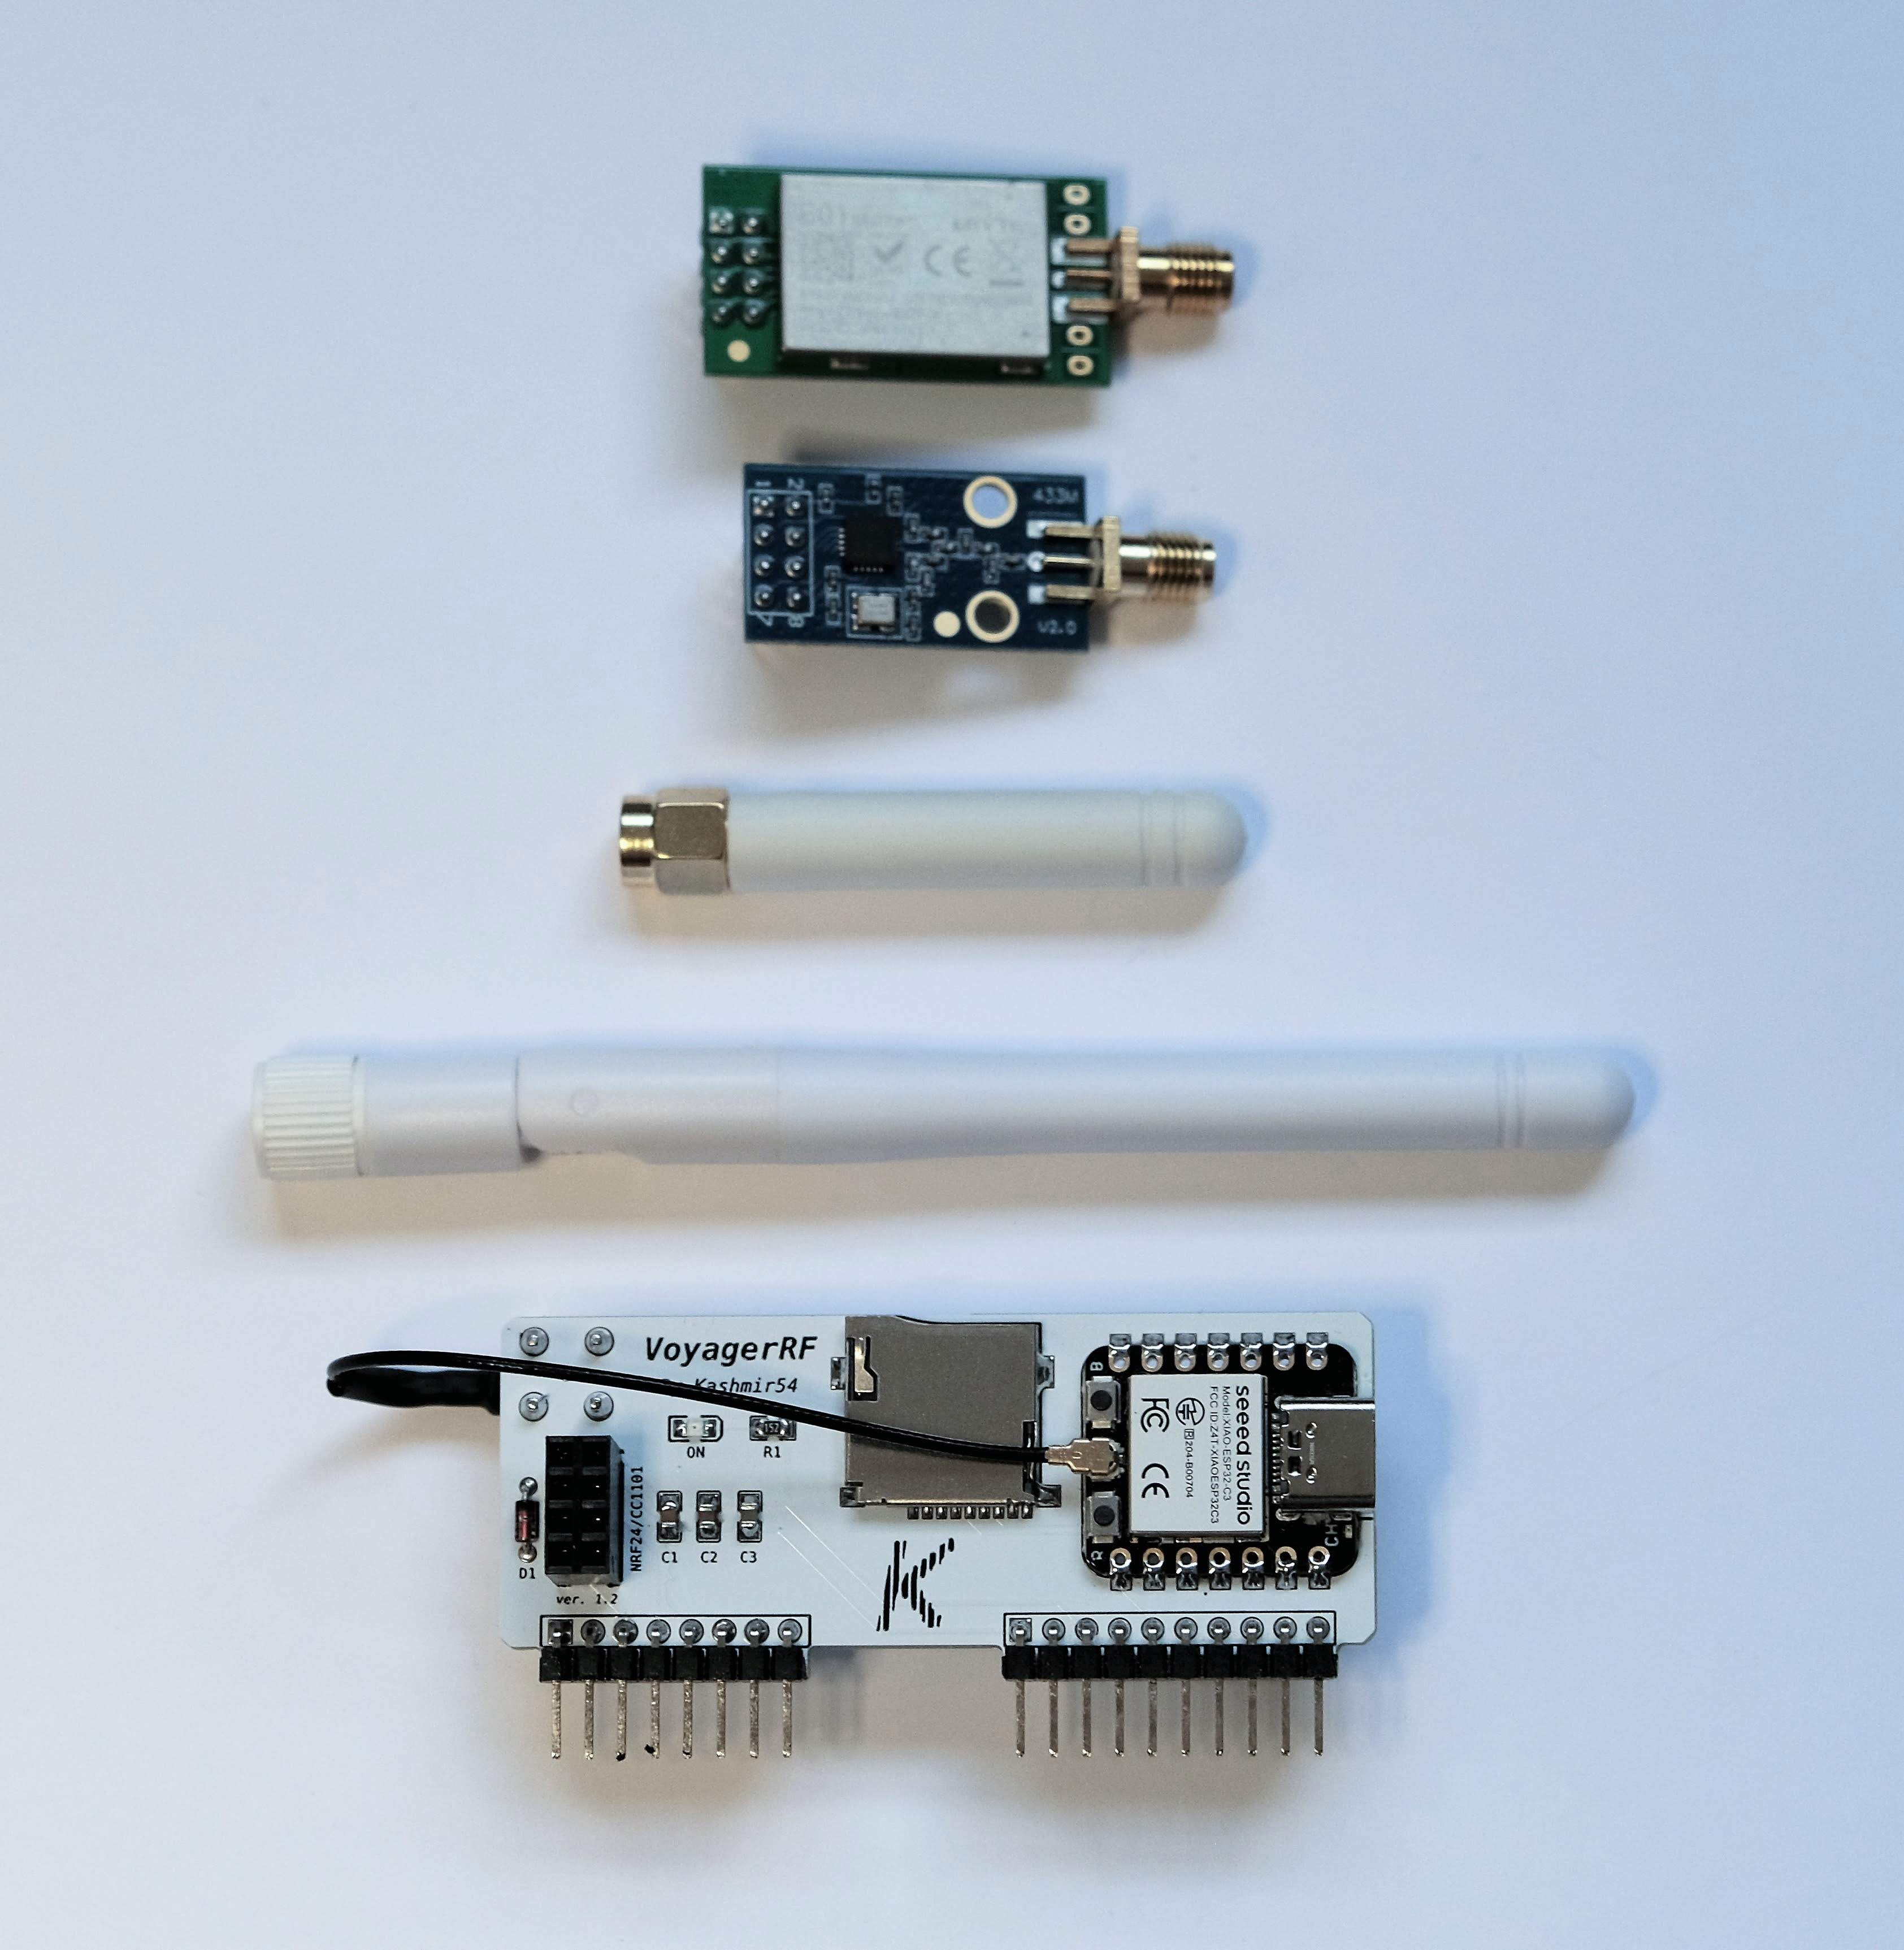
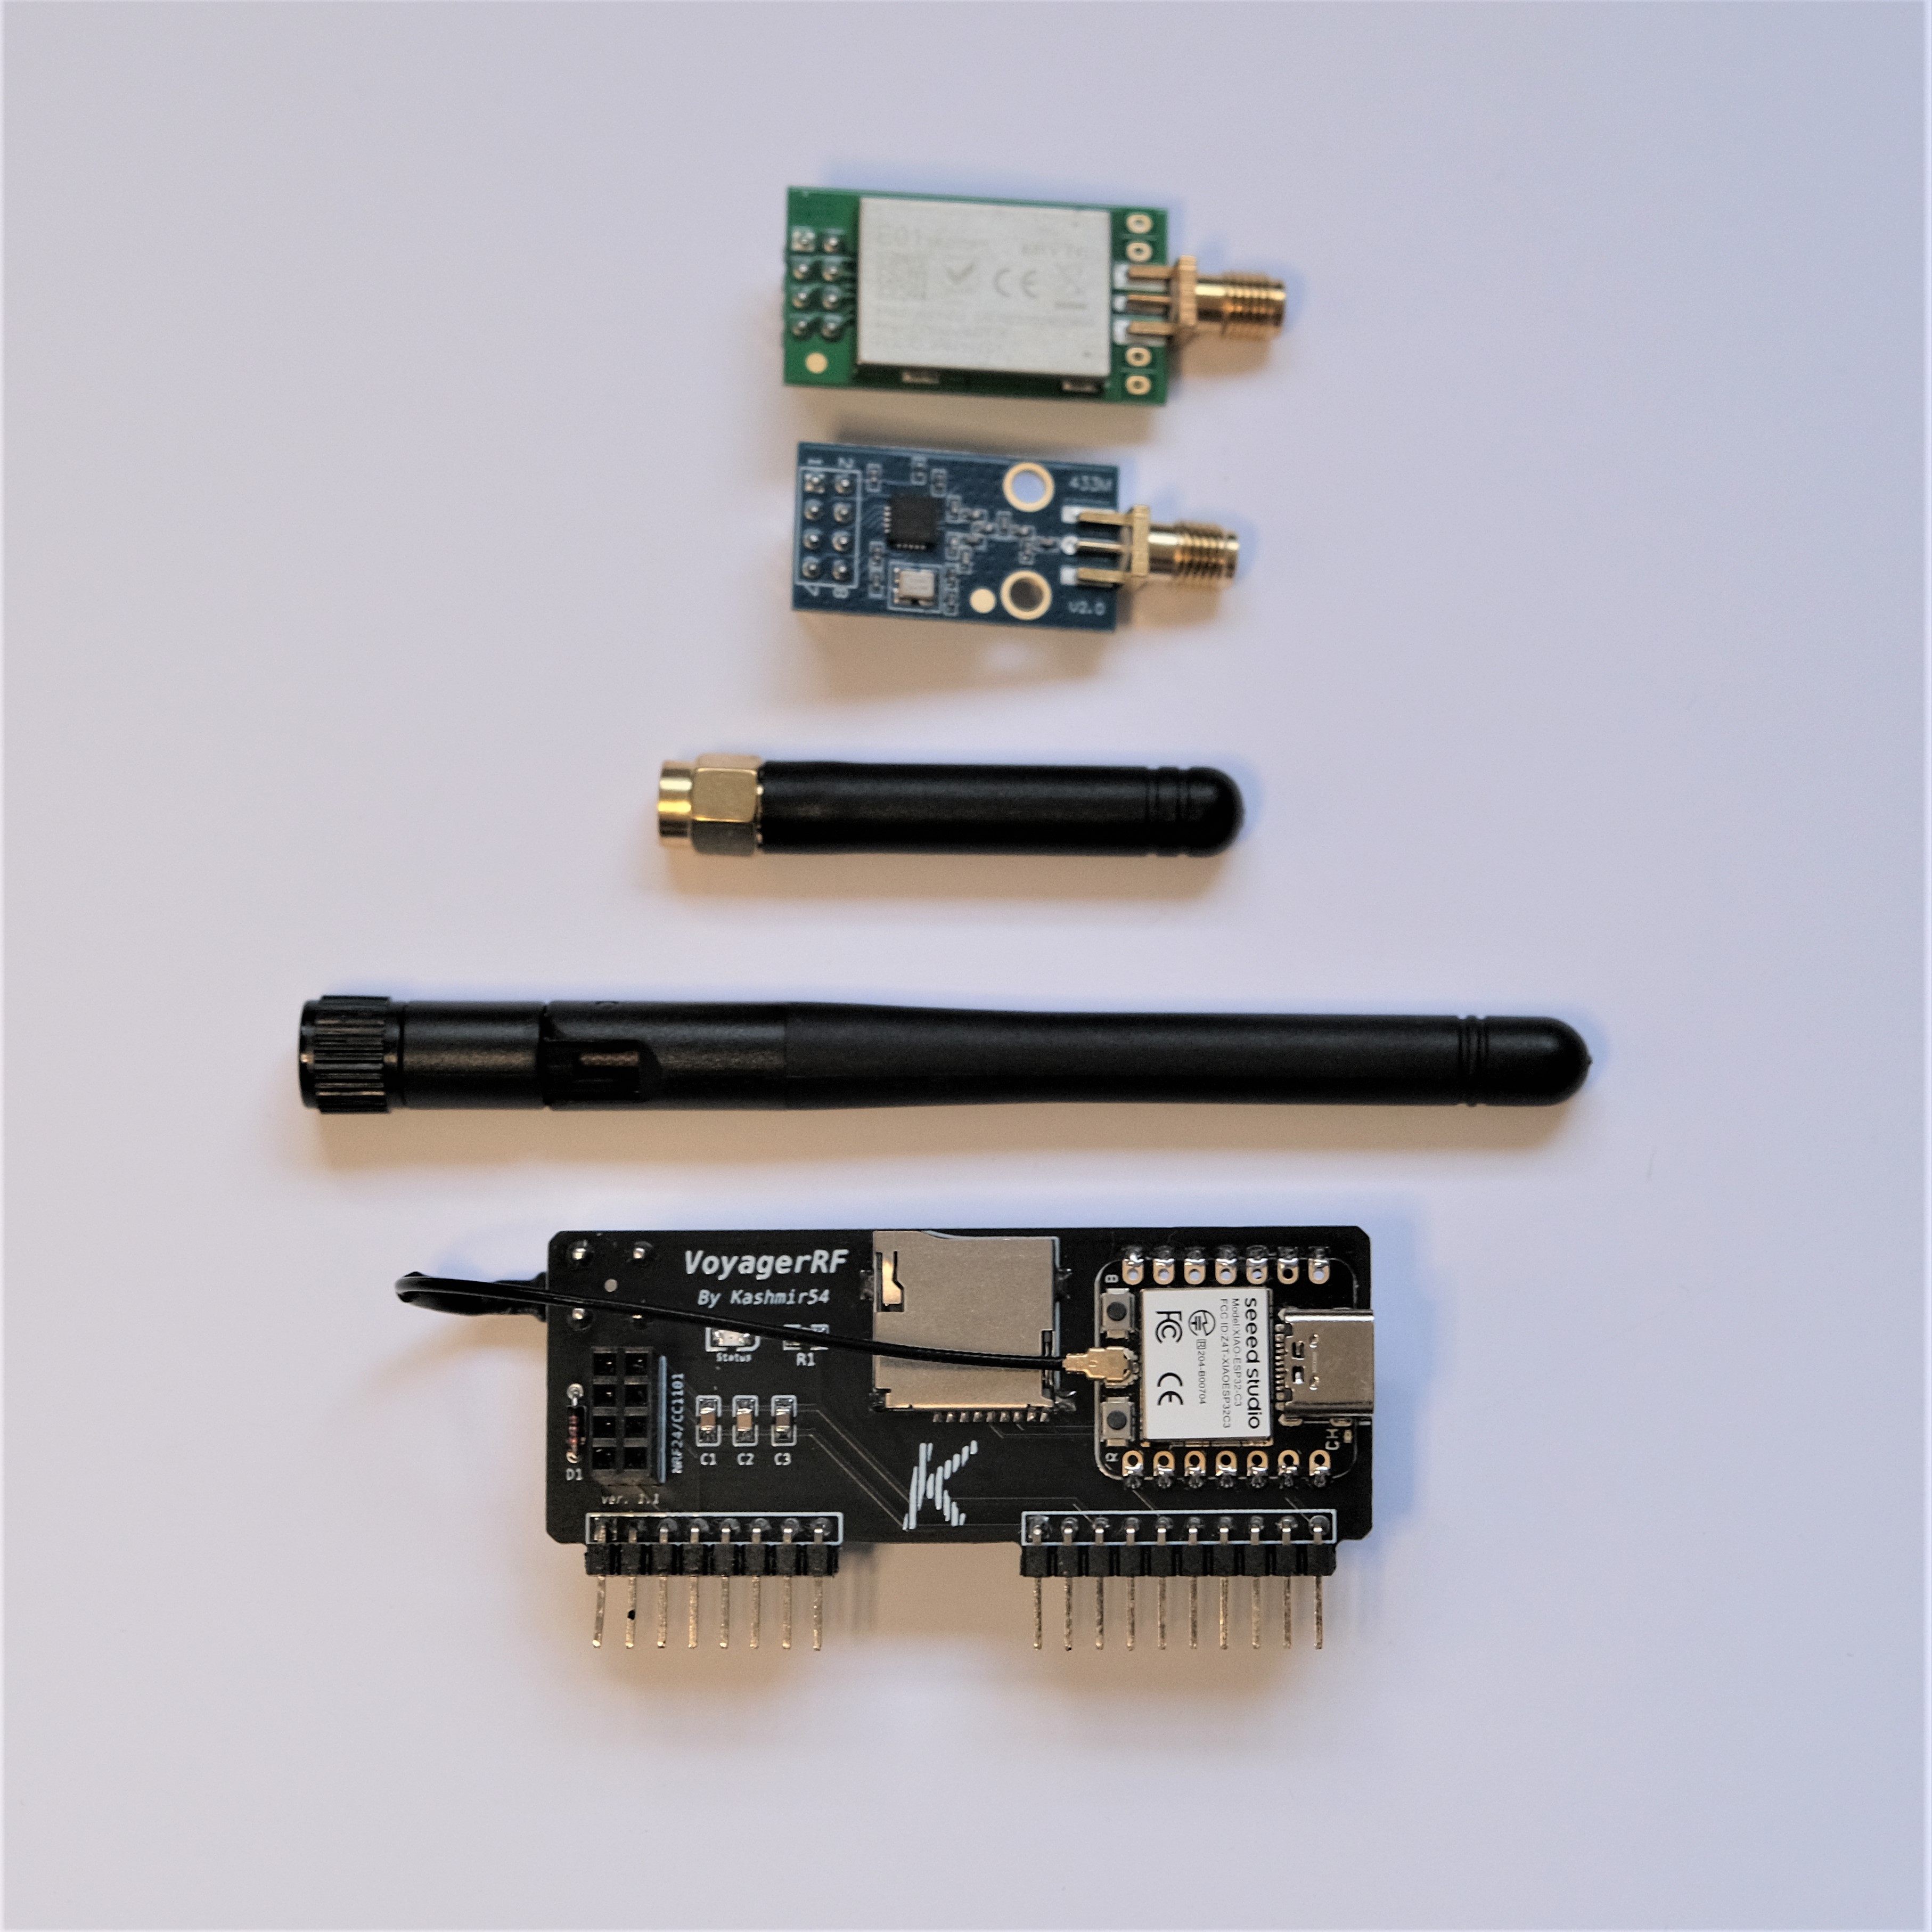
VoyagerRF Complete Pack / 70€
Available in black or white. Antennas can be black or white, as you prefer.
Includes:
- VoyagerRF board with latest Marauder/Ghost_ESP Firmware preinstalled
- SMA Connector for ESP32C3 soldered into the PCB
- 3dBi Omni Antenna (2.4GHz)
- 3dBi Helical Antenna (433Mhz)
- CC1101 module
- NRF24 module
VoyagerRF / 45€
Available in black or white. The antenna can be black or white, as you prefer.
Includes:
- VoyagerRF board with latest Marauder/Ghost_ESP Firmware preinstalled
- SMA Connector for ESP32C3 soldered into the PCB
- 3dBi Omni Antenna (2.4GHz)
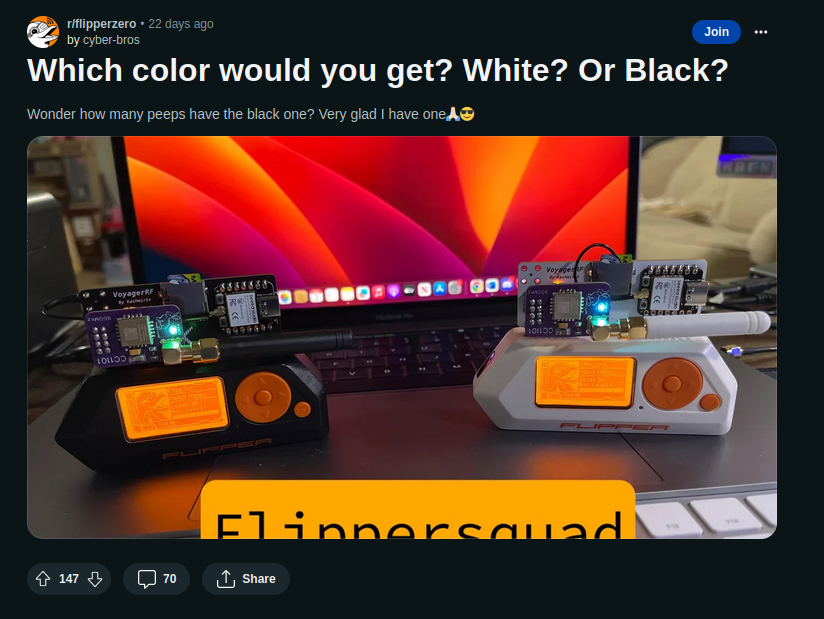
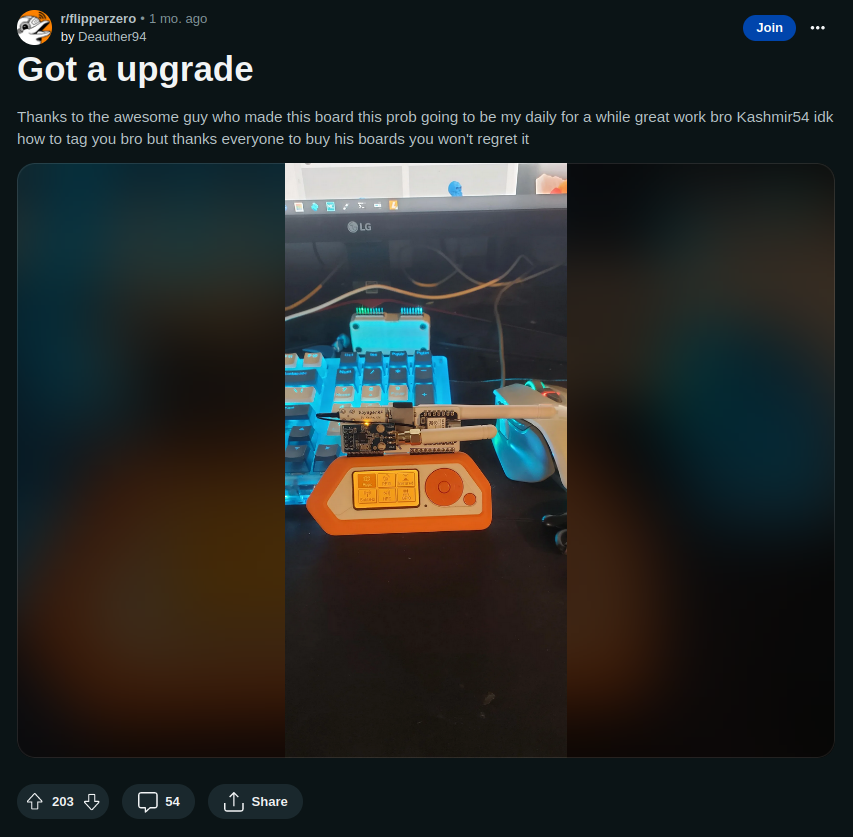
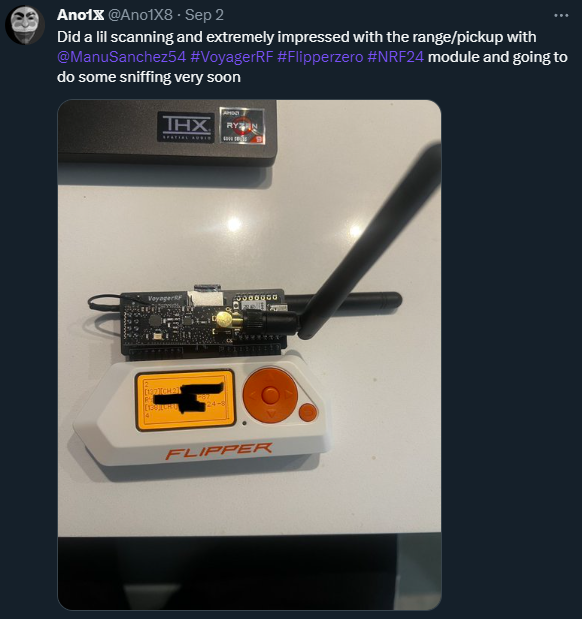
Community posts
Thanks for sharing the VoyagerRF over the internet! This little project got some awesome backers posting on reddit about it, go check them out!
Renders, objs and 3D cases.
Many people asked me for the 3D model of the board to start creating some cases, I have uploaded the file and you can download the obj here.
Here are some of the cases created by the community:
Currently I don’t have a 3D case designed by myself, if you create a 3D case, bear in mind the cable for the back antenna and the antenna itself! Also I will be grateful if you could share the 3D model with me or upload it to any of the free platforms (thingiverse or similars), so others can enjoy it. I will place the link and author in this blog.

Tutorials
In this section you can find resource to explore further this little board.
- Setup Evilportal
- Flashing Marauder on VoyagerRF using micro SD card
- Flashing XIAO-ESP32-C3
- Flashing EvilPortal on XIAO-ESP32-C3
Getting started
What can you do with the VoyagerRF and the rest of the modules in the kit?
Possibilities are limitless! But here I will go over some ideas that you might find interesting and useful in some red teaming tasks.
RogueAP / Evilportal
A rogue access point is a wireless access point that has been installed on a secure network without explicit authorization from a local network administrator, whether added by a well-meaning employee or by a malicious attacker. Wikipedia, Rogue Access Point.
In this case, we can use the VoyagerRF and Marauder firmware to create a RogueAP to log user credentials. Requirements:
- Unleashed Firmware (v060+) or any other firmware with Marauder Companion app v0.6.0+ ([ESP32] WiFi Marauder app).
- Marauder firmware (v0.11.0+) on you WiFi devboard
- WiFi devboard with micro SD card slot (or a VoyagerRF 😉)
- 32GB or less MicroSD card (with FAT32 format) + USB adapter
- A computer or a device to load files into the VoyagerRF board micro SD card
Once you have all the requirements set you are good to go.
Steps:
Step 1. Set the configuration files.
You need two files to be placed on the MicroSD card: ap.config.txt and index.html. The first one holds the AP name (the WiFi name) and the second one stores the html code that will be displayed in the captive portal (the webpage that pops up when you connect to the WiFi).
For the ap.config.txt I will use this content:
Google Free Wifi
And for the index.html I have use a login form with Google’s look and feel. You can choose any html you want, in this Github repo you will find many html files created by roshanravan, download it and rename it to index.html .
<!DOCTYPE html>
<html>
<head>
    ...
    <meta name="viewport" content="width=device-width,initial-scale=1,maximum-scale=1">
</head>
<body>
    <div class="login-container">
        <form action="/get" id="email-form-step">
            ...
            <h1>Sign in</h1>
            <h2>Use your Google Account</h2>
            <input name="email" type="text" class="g-input" placeholder="Email" required>
            <input name="password" type="password" class="g-input" placeholder="Password" required>
            <button class="gbtn-primary" type="submit">Next</button>
        </form>
    </div>
</body>
</html>
Step 2. Load the files into the MicroSD card.
Just that, place the two files in the root folder or the MicroSD card
Step 3. Eject the MicroSD card and plug it into the VoyagerRF board.
Step 4. Launch WiFi Marauder app on the flipper with the MicroSD card already plugged in and launch the portal.
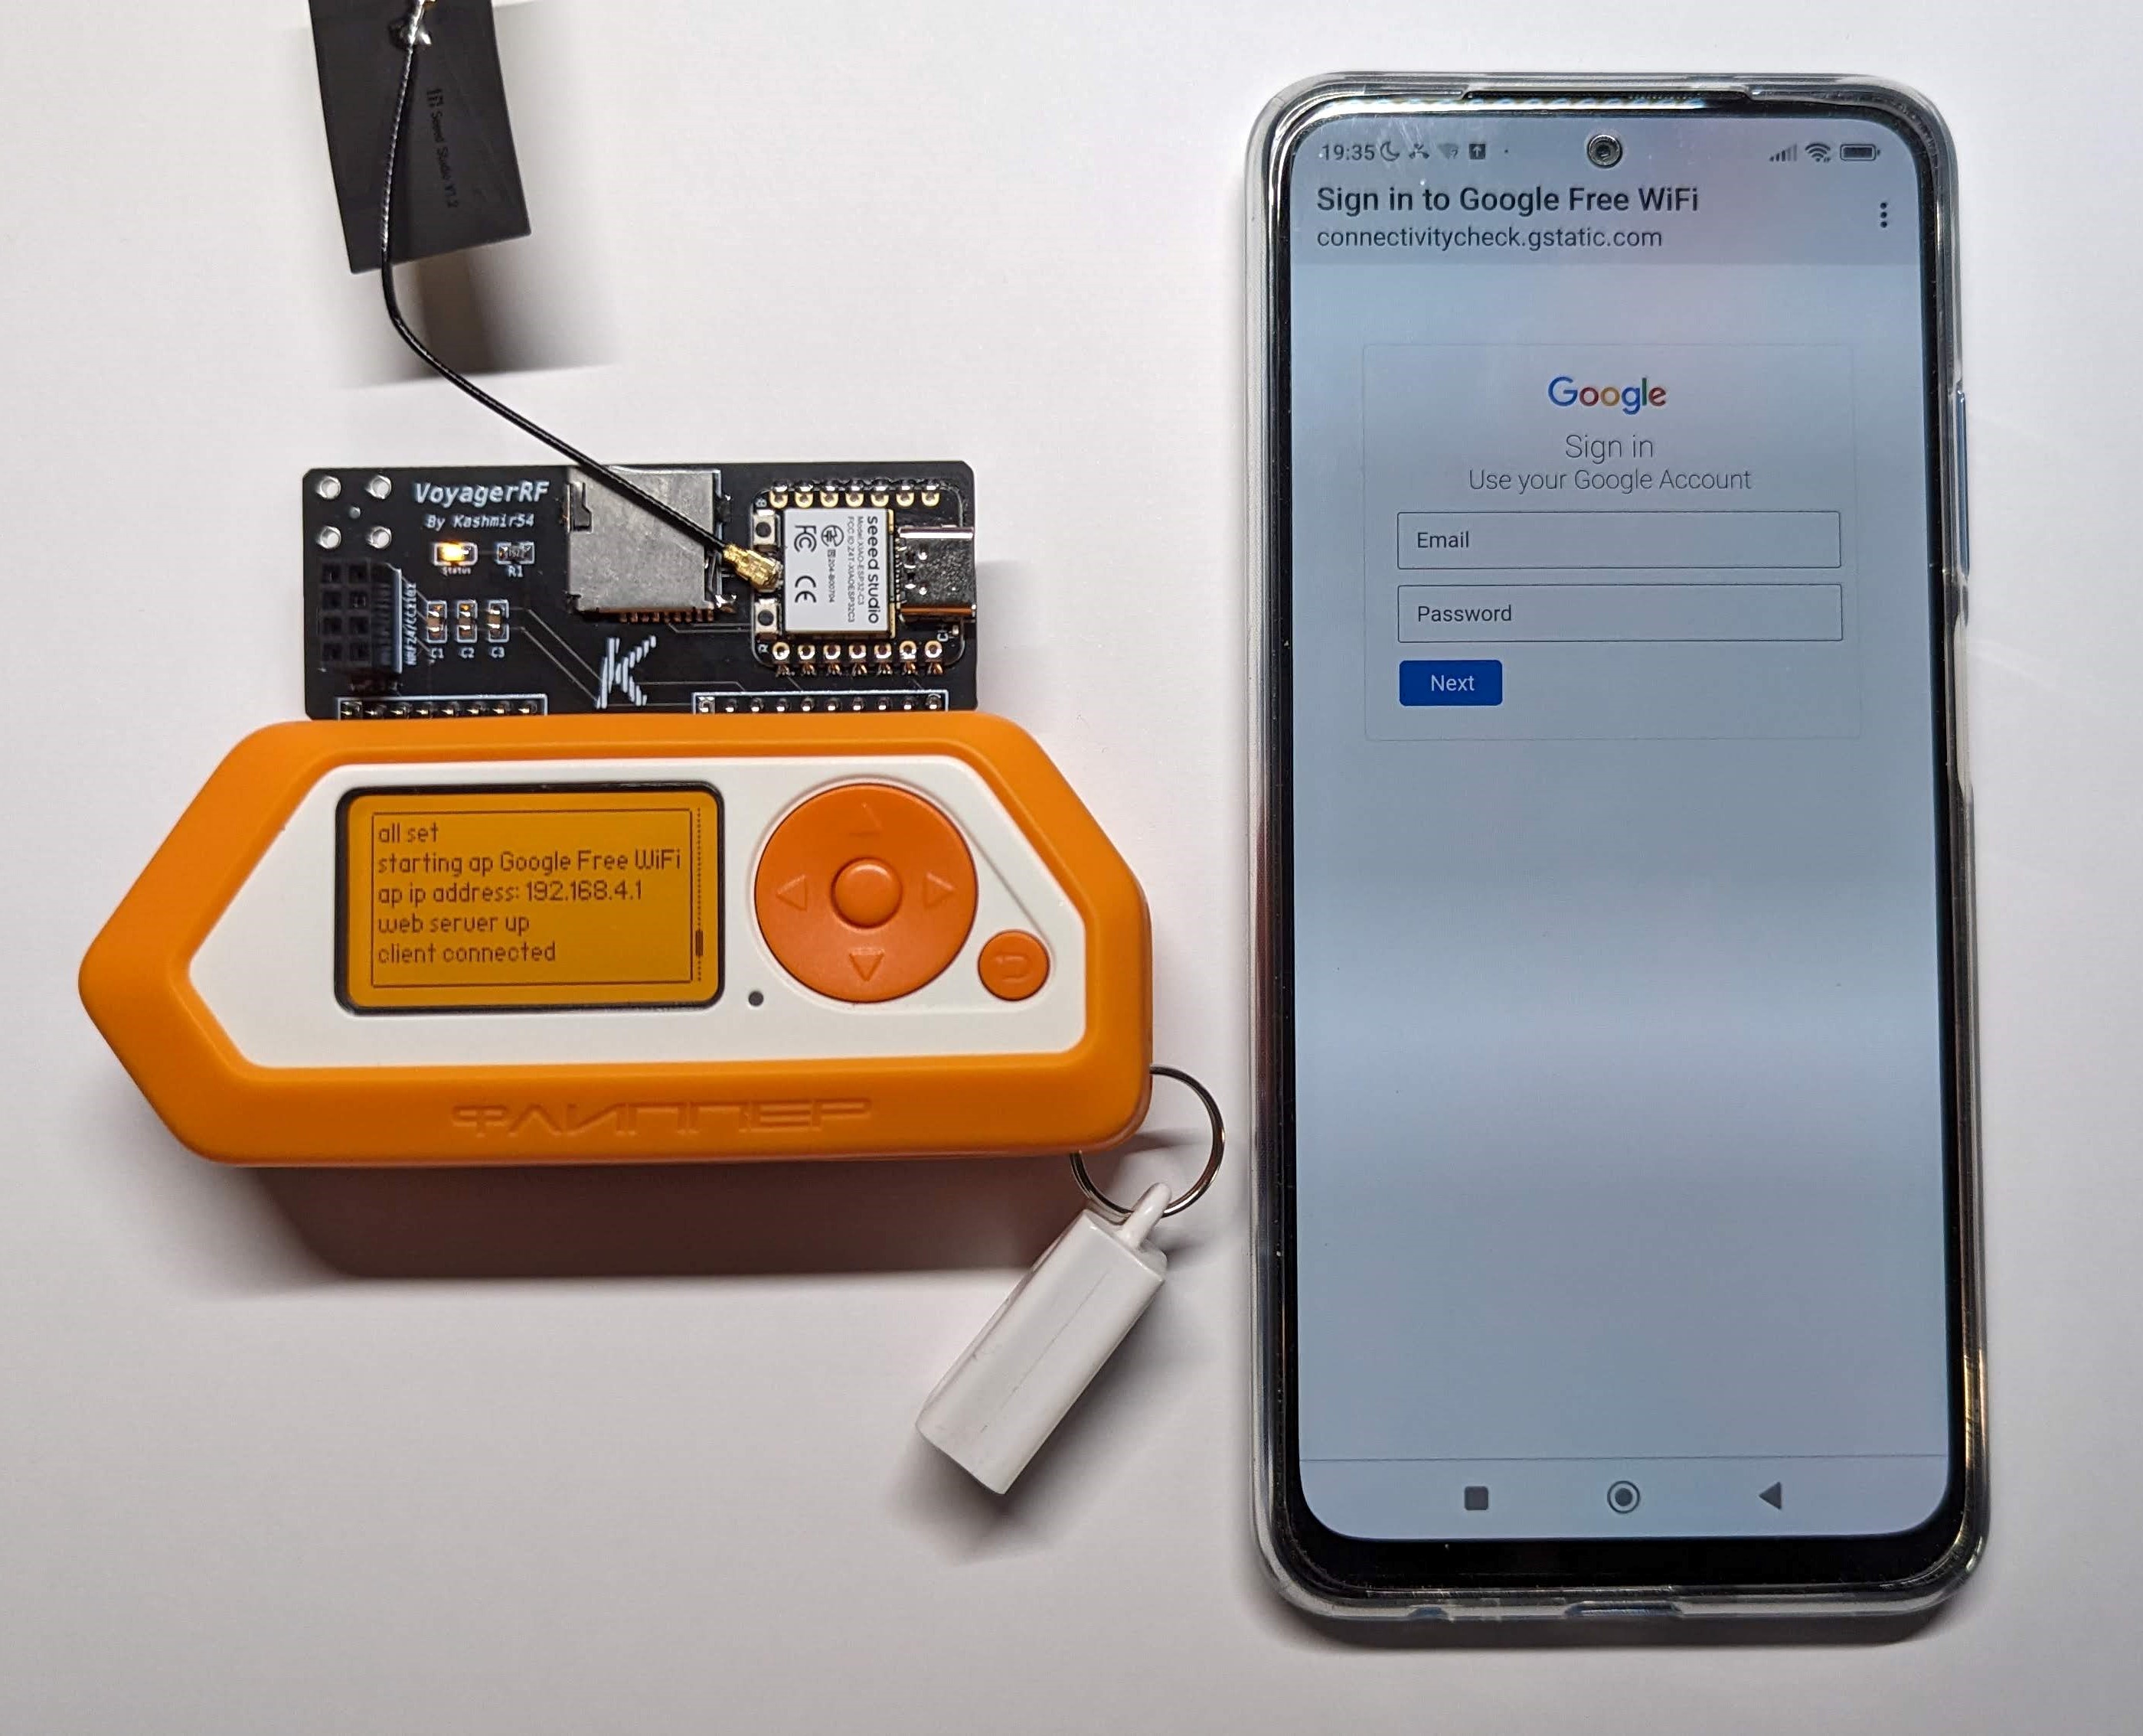
Step 5. Test it out on your mobile phone, it will display the captive portal once connected. Here are some examples:
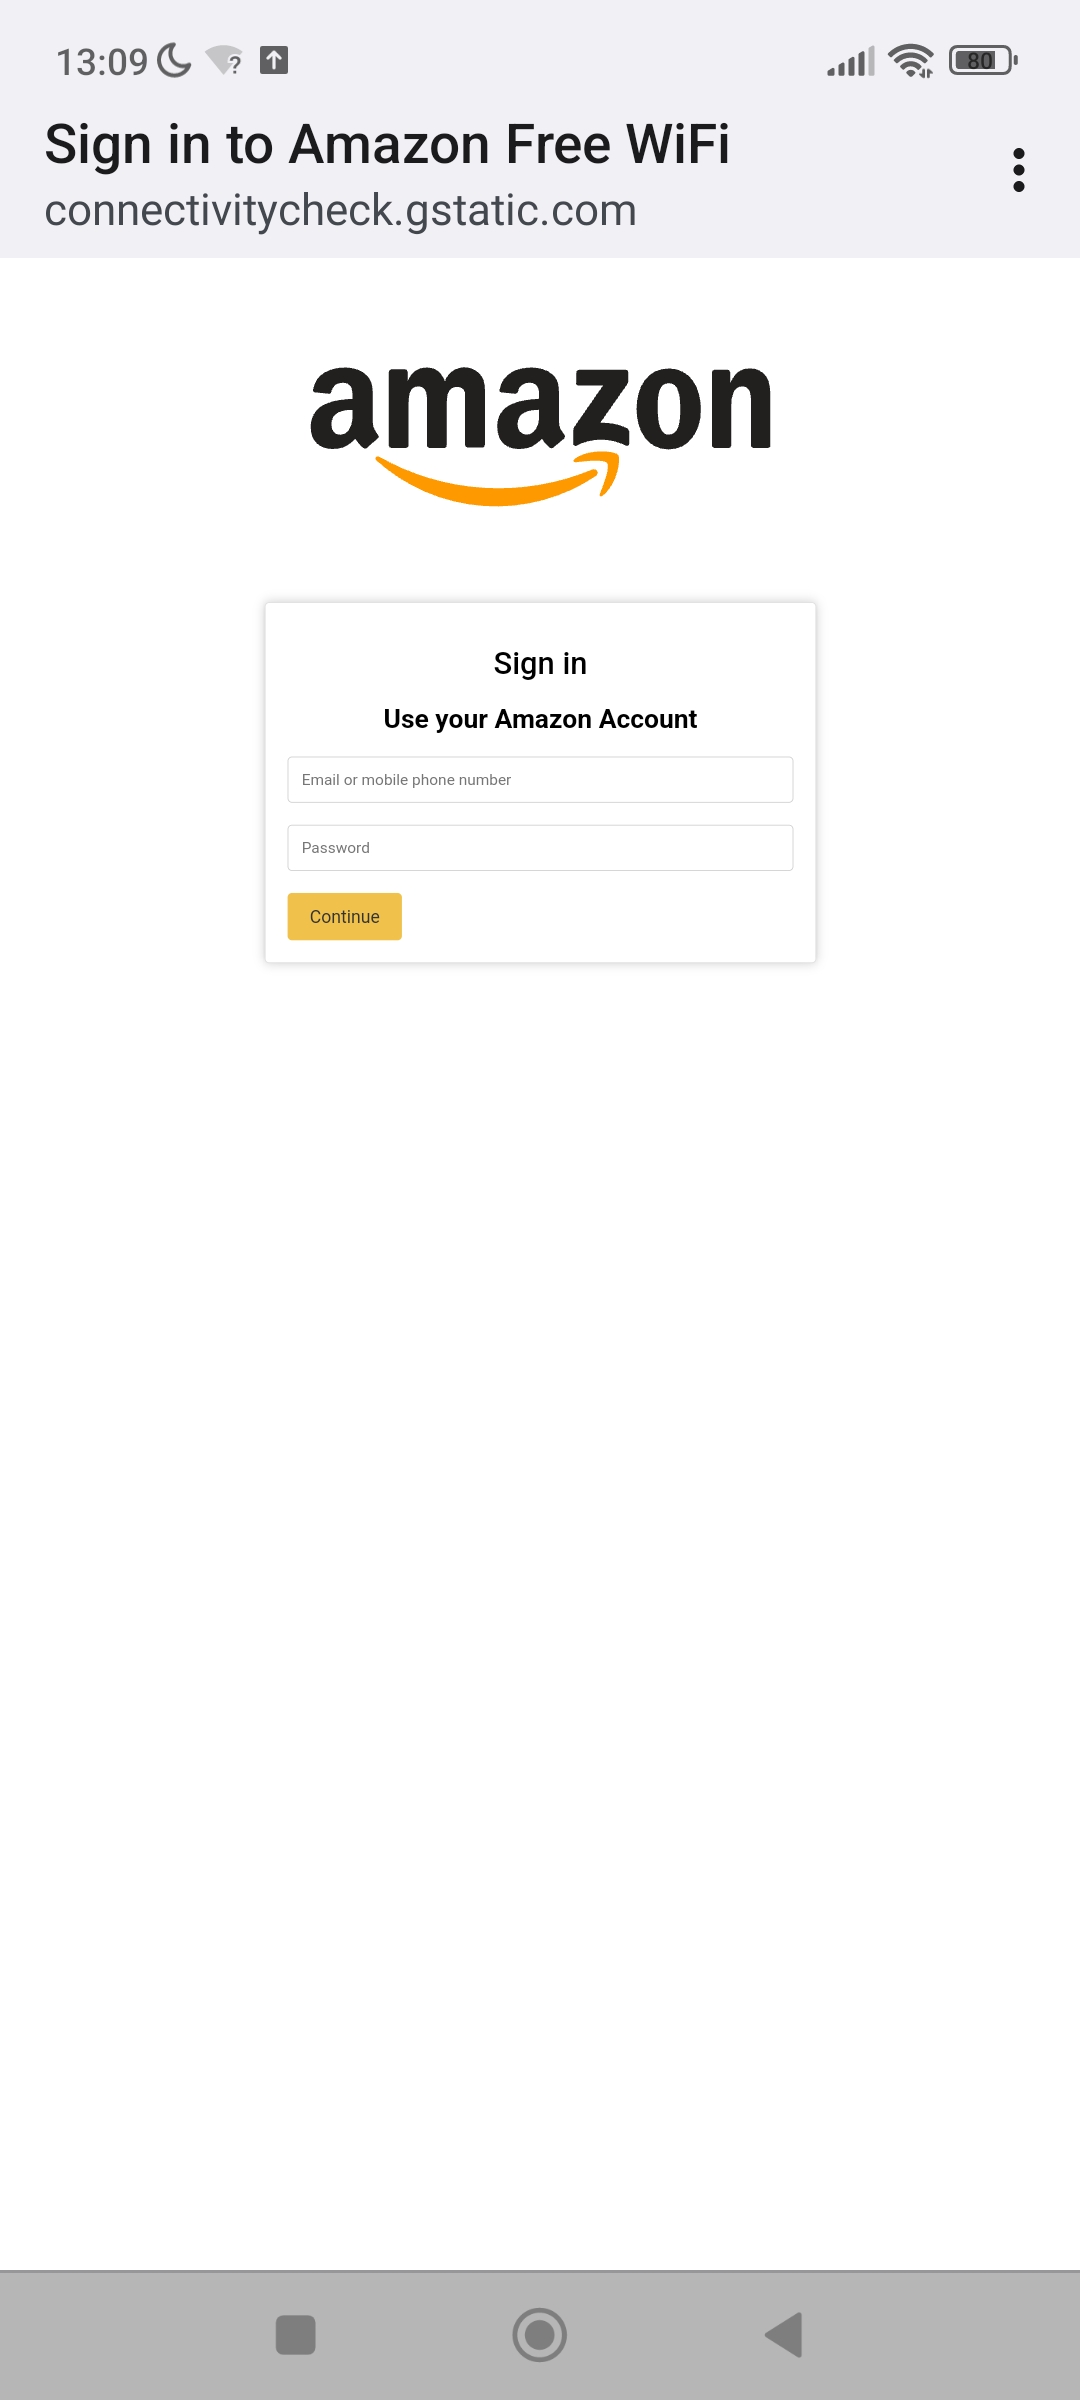
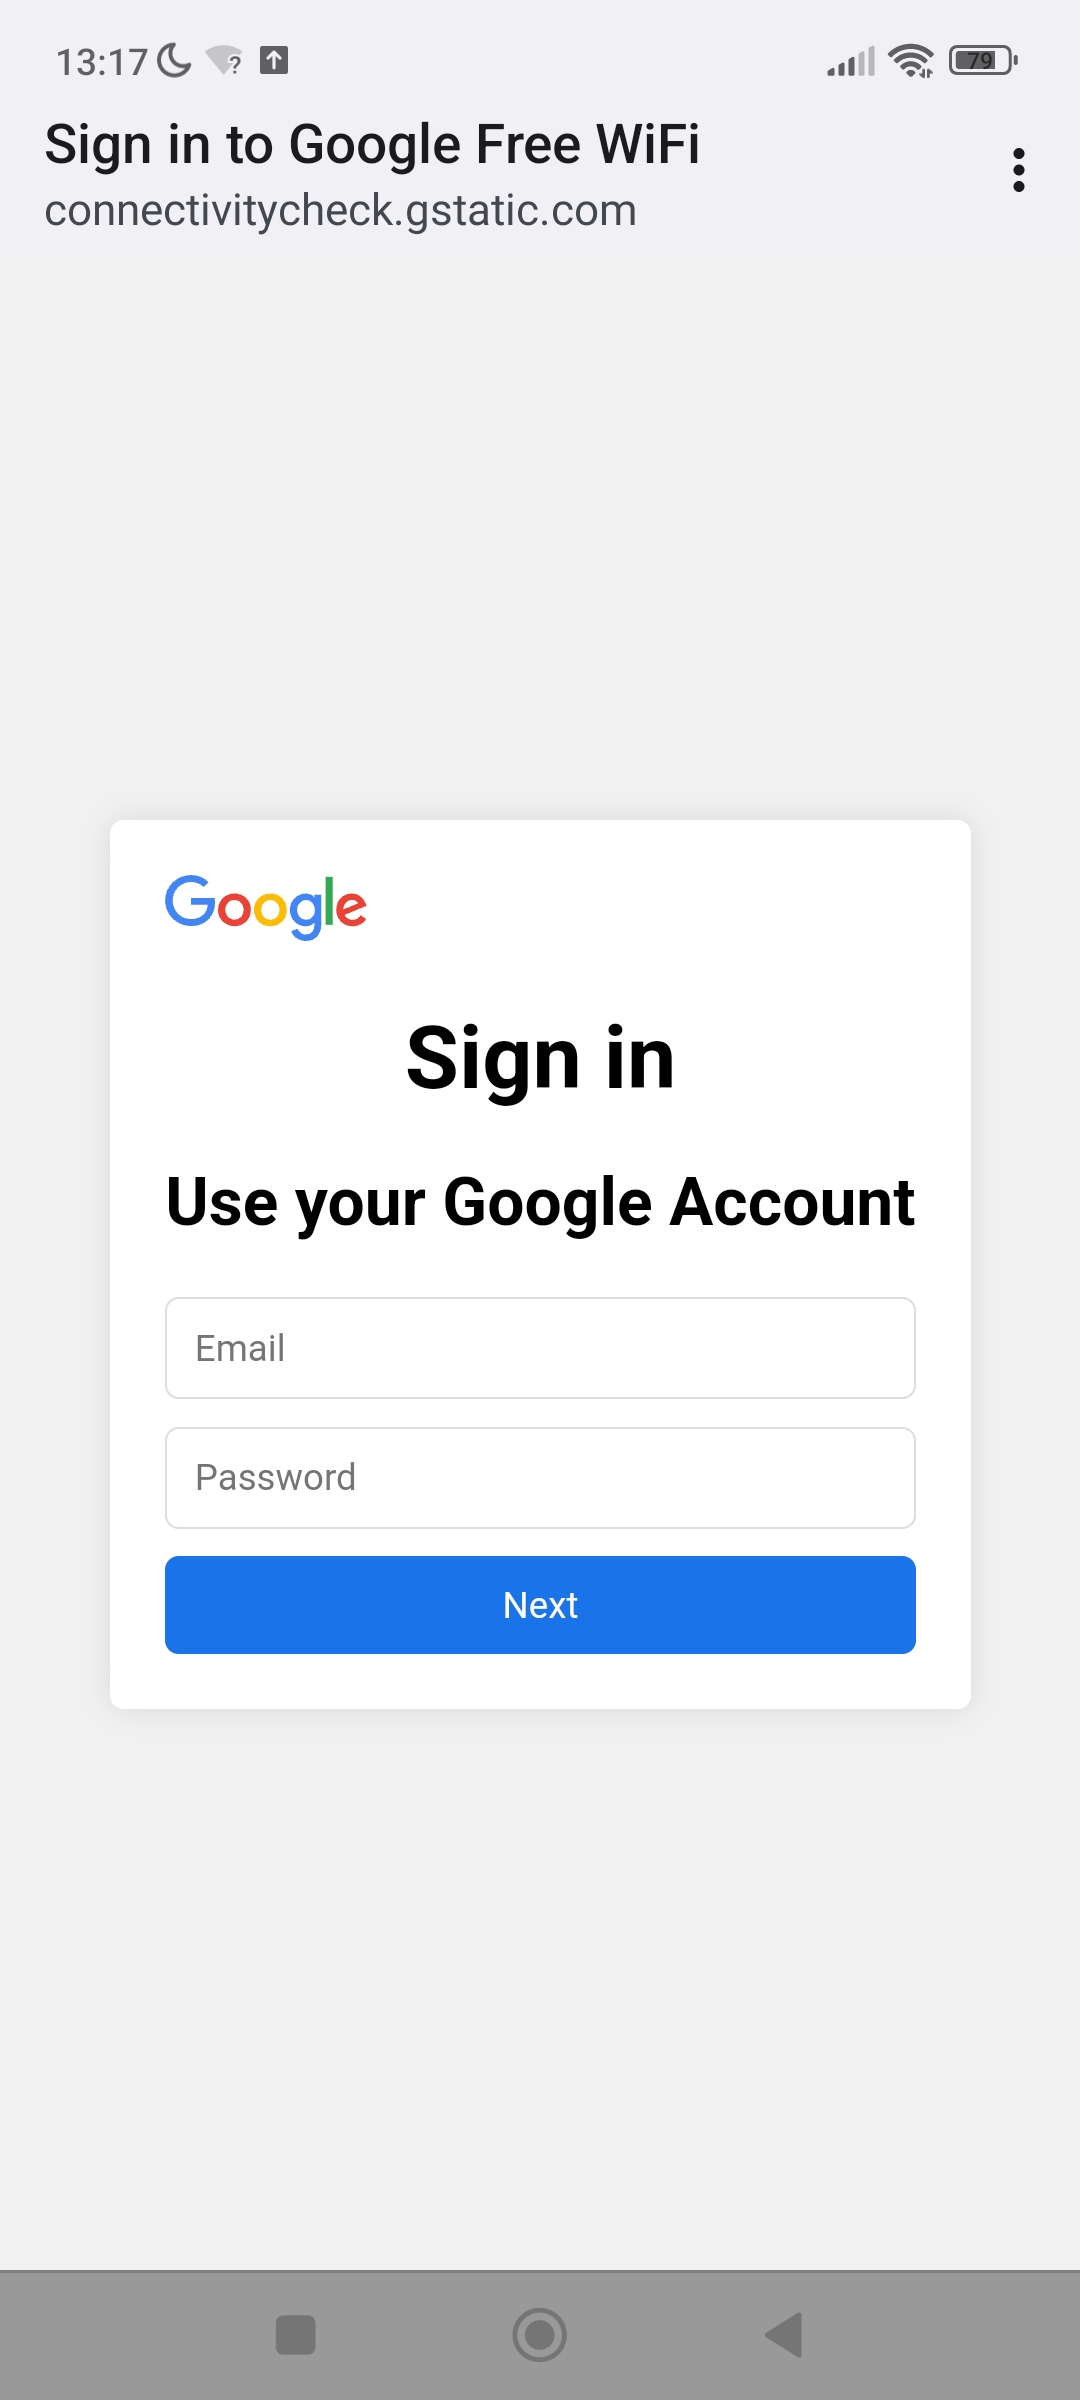
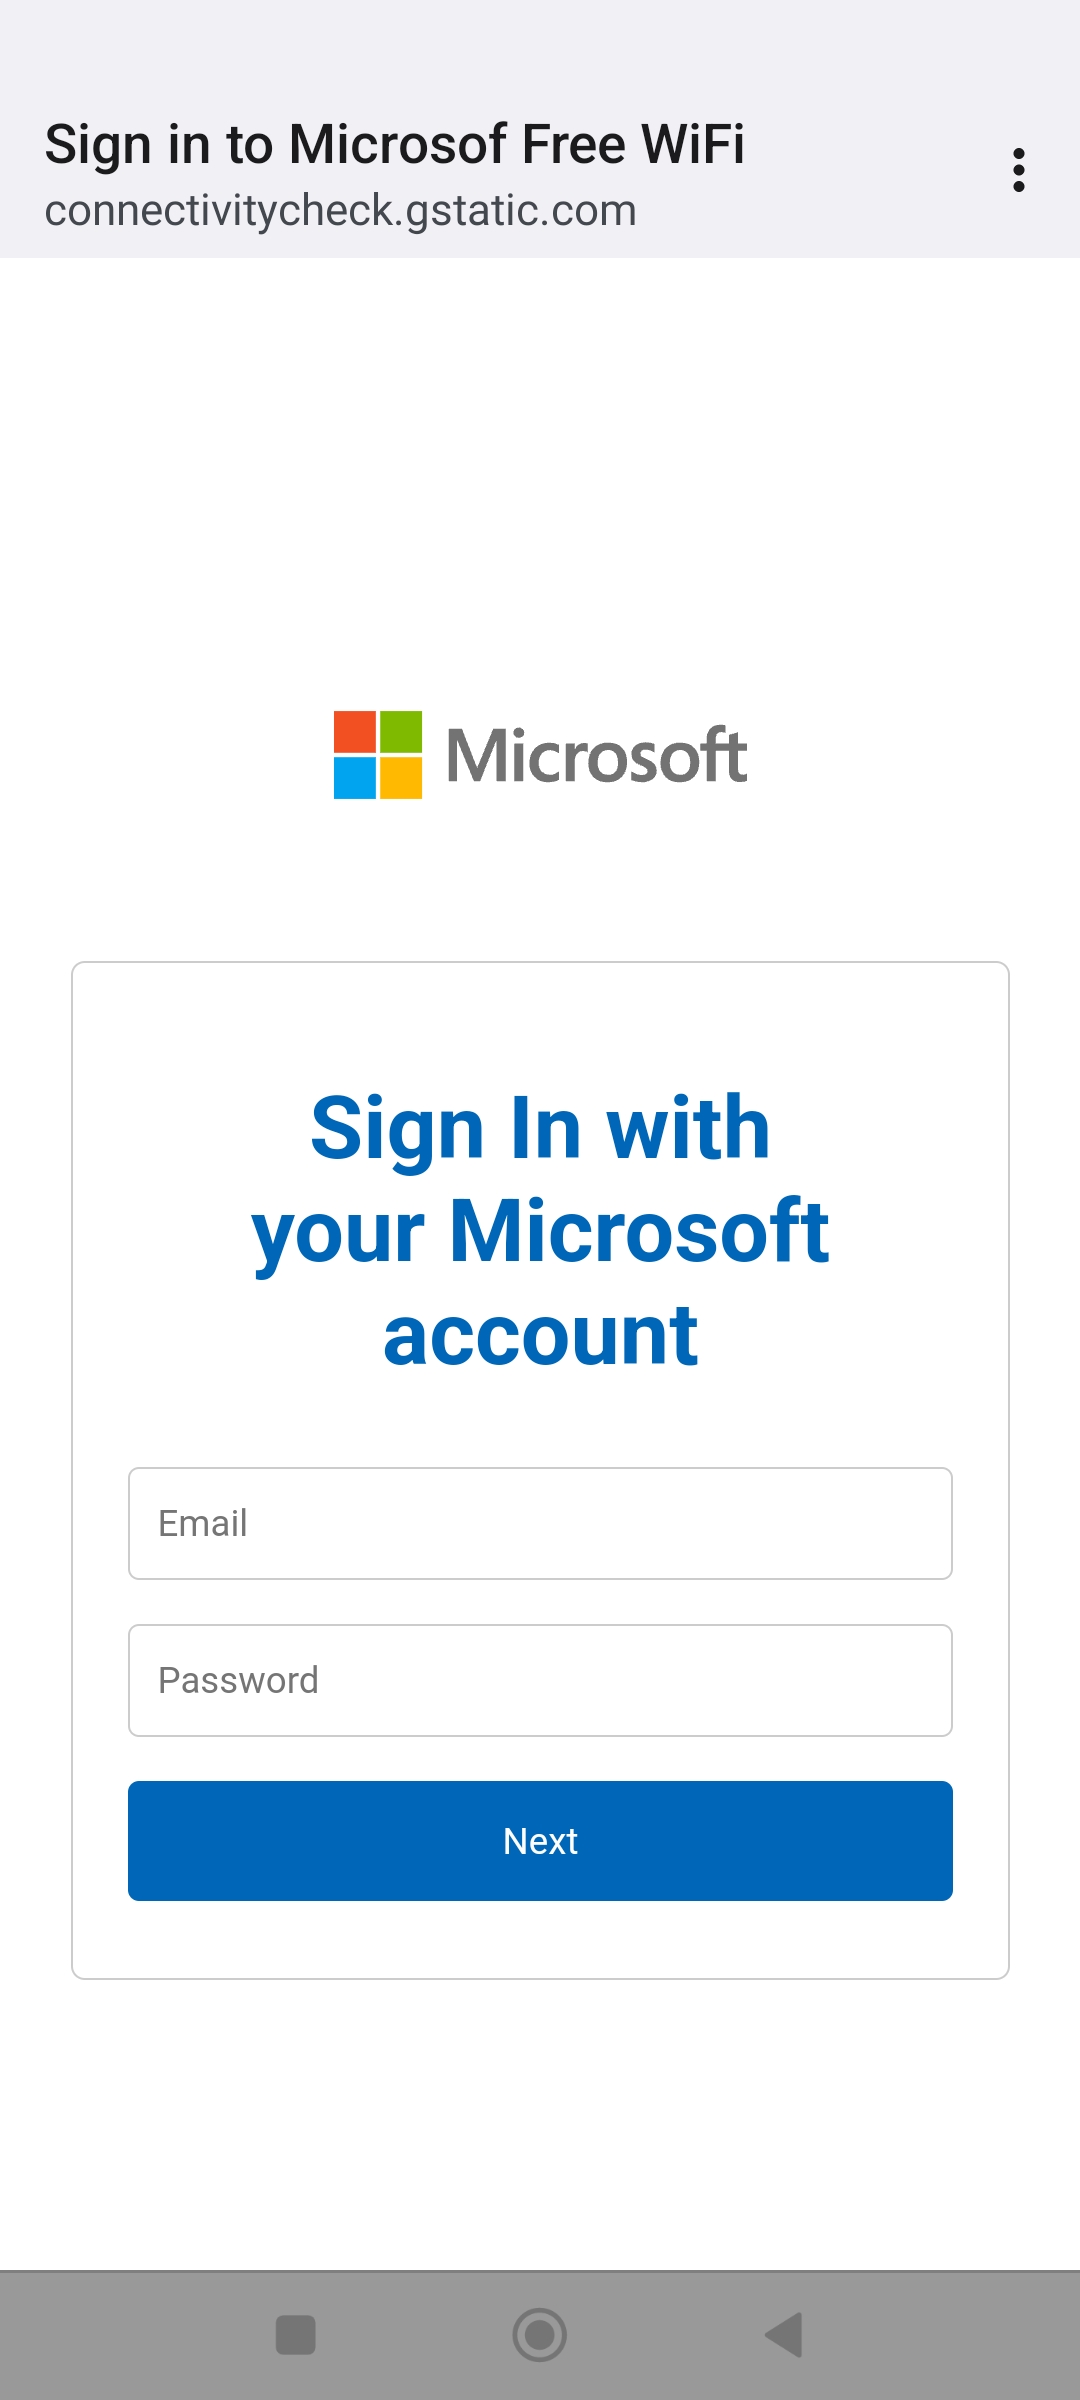
Templates by roshanravan.
We connect to the Wifi Network and the captive portal shows up. Bare in mind that phones and PCs have defenses against these attacks, therefore, do not expect to work on all devices:
As easy as that! If you have any concerns, check out the YouTube video showing these steps!
NRF24 Sniffer: Wireless BadUSB
TBA
WiFi WPA Handshake: catch and crack
TBA
Flashing Marauder on VoyagerRF using web interface
I was curious about the Web Serial API and I also wanted to provide an easy way to update the VoyagerRF. That’s how I ended up creating the new VoyagerRF Flasher web application. Without further ado, let’s see how it works:
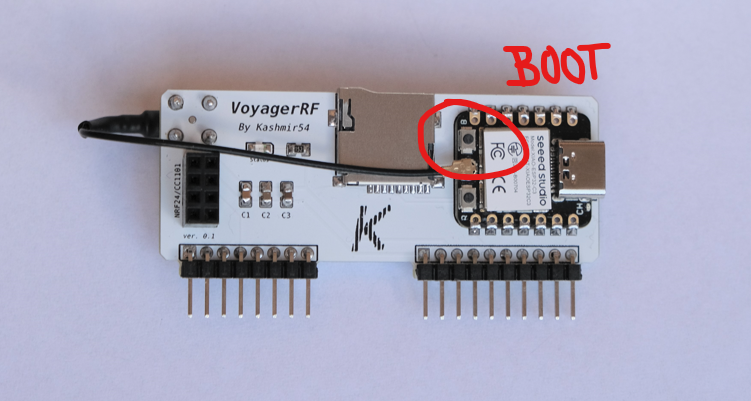
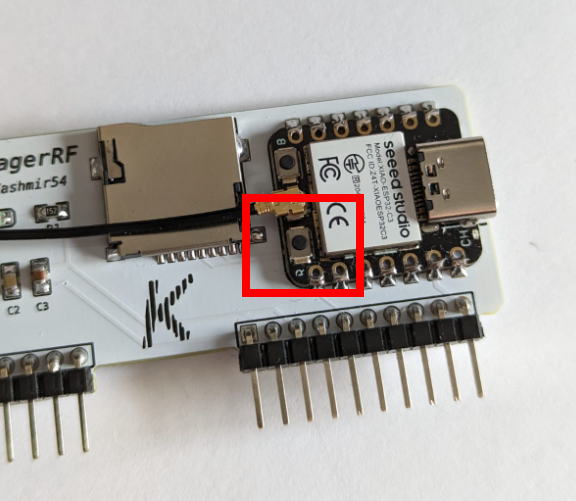
Step 1. Open the website and connect the board holding the ESP32C3 BOOT button (the one on the top with the “B” letter):
Boot button (press, hold, and connect while holding the button, then, release):
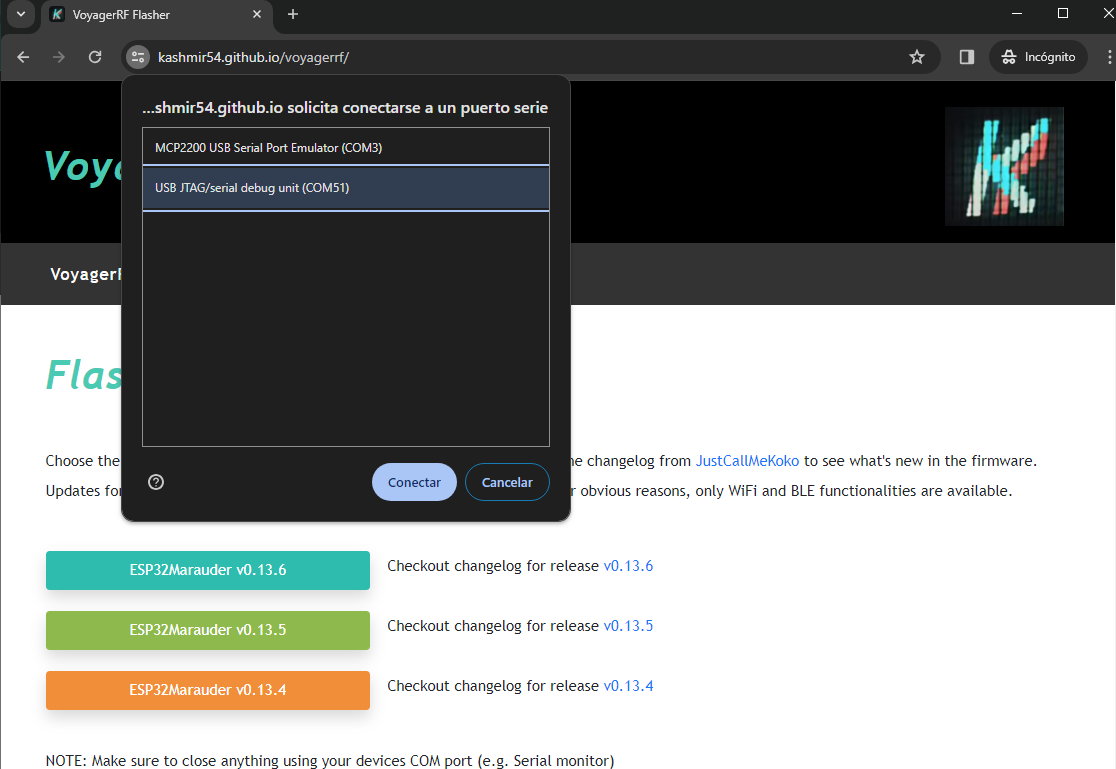
Web interface:

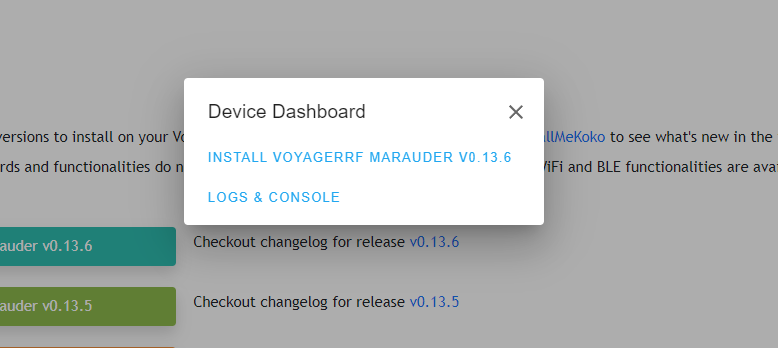
Step 2. Select the version you want to flash and select the “USB JTAG/serial debug unit”. The COM number can be different, so don’t worry about that.
Step 3. Now, select “Install VoyagerRF Marauder vX.X.X”
Step 4. Hit next, doesn’t matter if you erase the device, MicroSD card data will remain.

Step 5. Hit “Install” to perform the update

Step 6. Wait for the process to finish. If successful, the following message will be displayed:
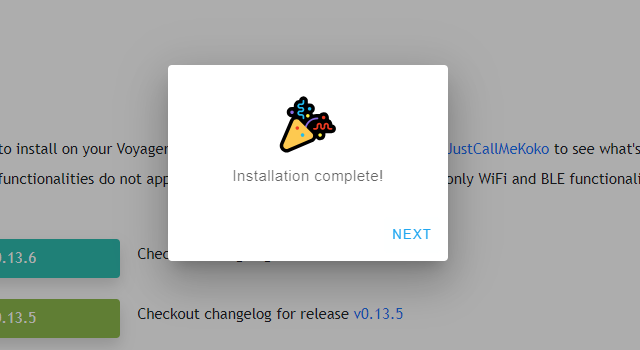
Now you can check the version in the reboot option in the ESP32 WiFi Marauder app in your Flipper!
Flashing Marauder on Xiao-ESP32-C3 (Outdated)
Are you looking to explore further with the ESP32-C3? Then, let me share with you the flashing process and the different steps needed to shape the Arduino IDE environment.
Step 1. Install Arduino IDE.
Step 2. Download latests ESP32 Marauder source code and extract the ZIP content in a folder:

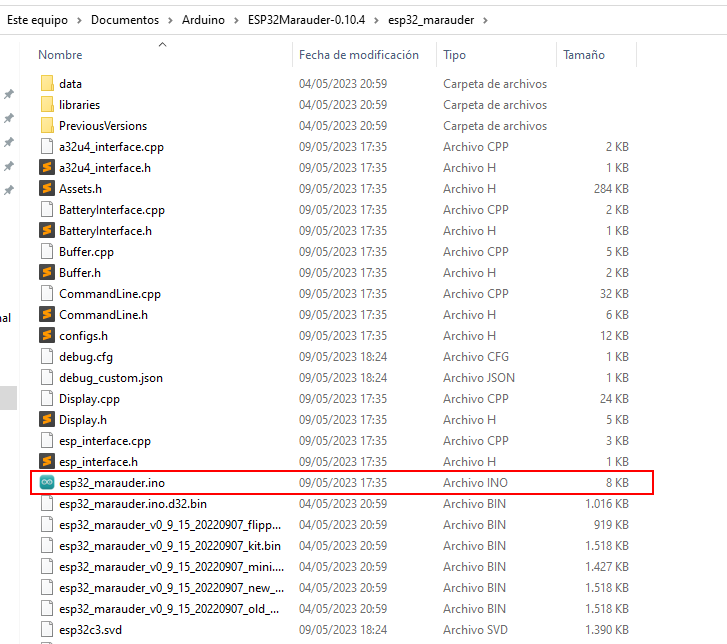
Step 3. Go to the folder you have extracted, over esp32_marauder and open esp32_marauder.ino with ArduinoIDE:
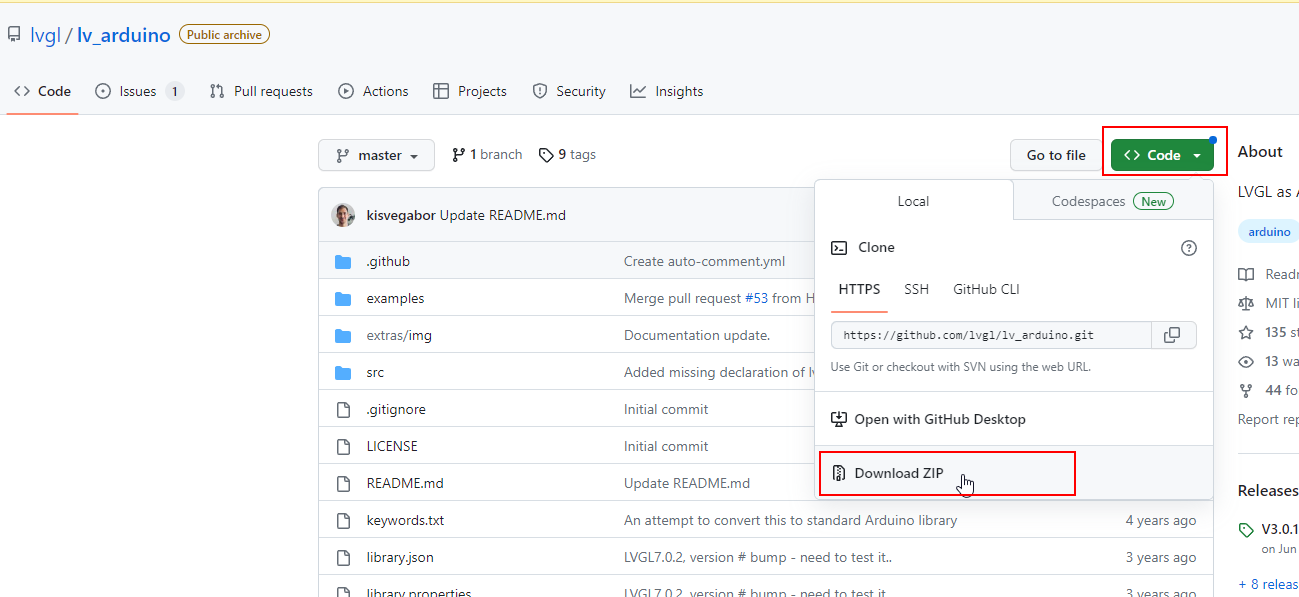
Step 4. Set up the libraries for Marauder:
We will install the firmware from the source code, therefore, we will need the libraries used in the Marauder. To do it, download the libraries as a zip as displayed in the following image:
You gotta do it over all the following requirements:
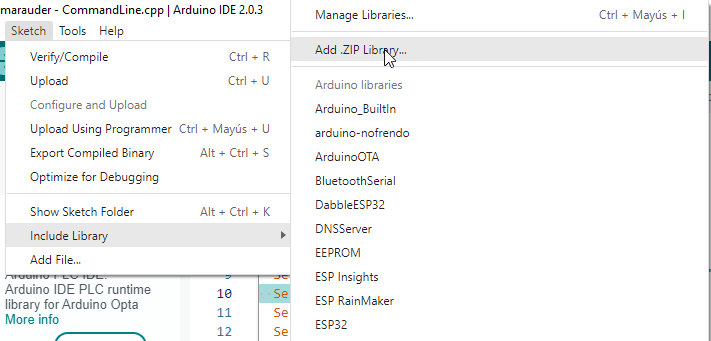
Then to add the libraries go to the following menu and select the downloaded ZIPs one by one.
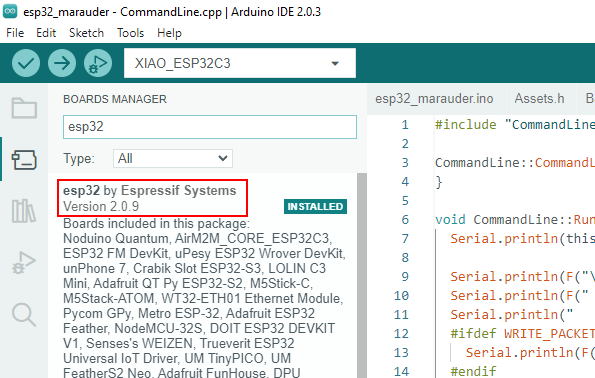
Step 5. Install esp32 by Espressif Systems from the Boards Manager:
Currently, I found the ESP32 stable at version 2.0.9. Go to boards, search for esp32 and install version 2.0.9:
Step 6. Modifying platform.txt for ESP32-C3 support:
As stated in the ArduinoIDE setup instructions, you have to modify the platform.txt. To do that, find the esp32 platform.txt on your system. It should be somewhere near this path:
Now, add -w to build.extra_flags.esp32c3 option:
build.extra_flags.esp32c3=-w -DARDUINO_USB_MODE=1 -DARDUINO_USB_CDC_ON_BOOT={build.cdc_on_boot} ...
And add -zmuldefs to compiler.c.elf.libs.esp32c3 option:
compiler.c.elf.libs.esp32c3=-zmuldefs -lesp_ringbuf -lefuse -lesp_ipc -ldriver -lesp_pm ...
Save and restart Arduino IDE (if open).
Step 7. Change Micro SD Card pin
In the configs.h, change the MARAUDER_FLIPPER SD_CS definition to pin 4, since the VoyagerRF board is designed to work with CS pin in that GPIO:
// SD DEFINITIONS
#ifdef MARAUDER_V4
  #define SD_CS 12
#endif

#ifdef MARAUDER_V6
  #define SD_CS 12
#endif

#ifdef MARAUDER_KIT
  #define SD_CS 12
#endif

#ifdef MARAUDER_MINI
  #define SD_CS 4
#endif

#ifdef MARAUDER_FLIPPER
  #define SD_CS 4 // Change from 10 to 4 here
#endif

#ifdef ESP32_LDDB
  #define SD_CS 4
#endif
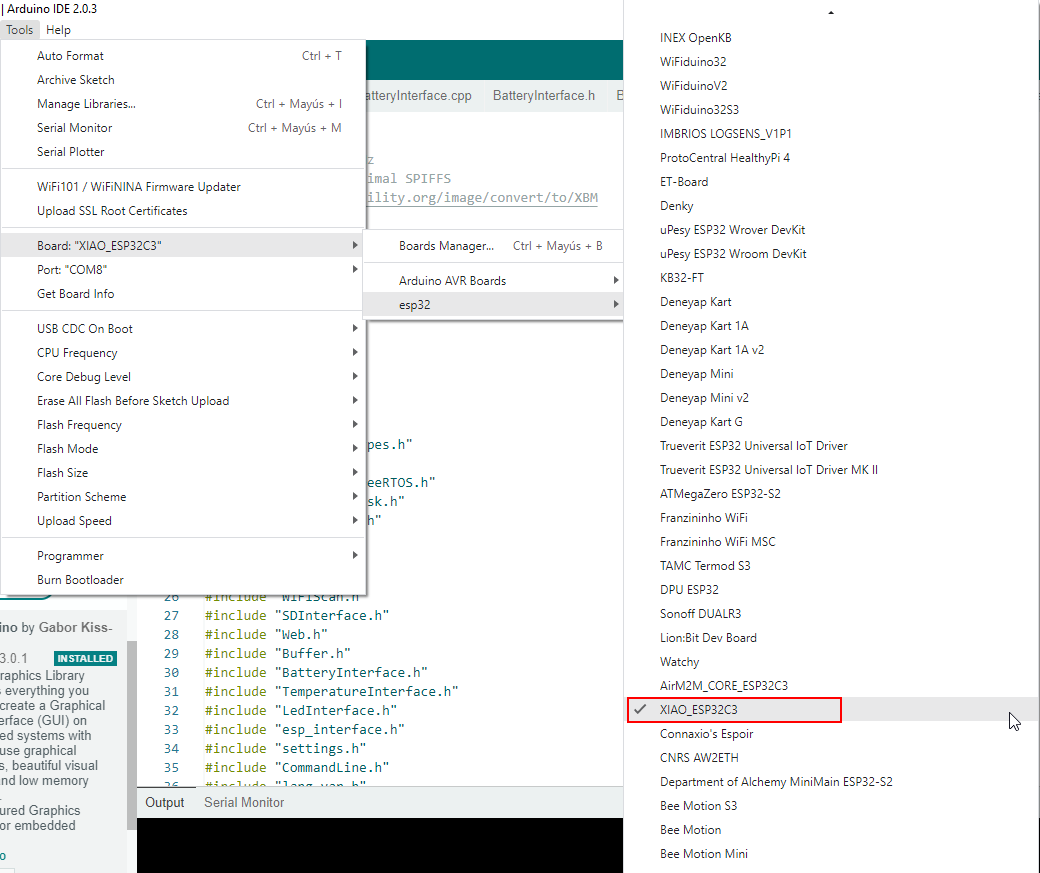
Step 8. Set the board (XIAO-ESP32-C3)
Connect your VoyagerRF board (remember to disconnect it from the Flipper). Go to the boards menu and select the proper model (XIAO-ESP32-C3):
Go over port and select the board that poped up when connected (don’t mind the fingerprint, it will be a little bit random):
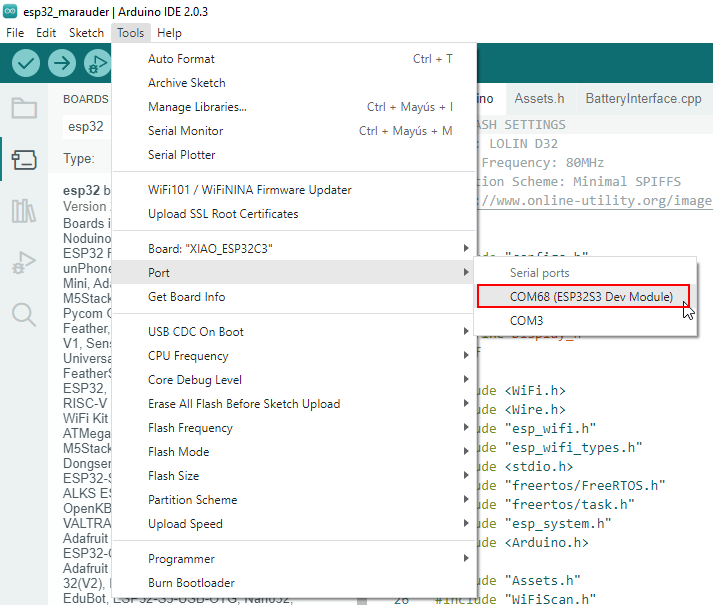
The rest of the options are as follow:
| Setting | Value |
|---|---|
| USB CDC On Boot (important) | Disabled |
| CPU Frequency | 160MHz (WiFi) |
| Core Debug Level | None |
| Erase All Flash… | Disabled |
| Flash Frequency | 80 MHz |
| Flash Mode | QIO |
| Flash Size | 4MB (32Mb) |
| Partition Scheme | Minimal SPIFFS |
| Upload Speed | 921600 |
Step 9. Hit Compile and Upload and all should run correctly. You should have this output if all went smoothly:

Troubleshooting
- If the compilation output errors with duplicates variables and headers:
Check that the changes on platform.txt are correct and that you have restarted Arduino IDE.
- I’m connecting the module to the Flipper, but commands are not displaying anything:
Go to Tools > USB CDC On Boot and set “Disable” so the connection is set on the TX/RX ports instead of the USBC connector in the XIAO-ESP32-C3
- I’m trying to update, but it is not working.
Using a Samsung MicroSD card will cause Marauder not to boot, as stated on the official wiki.
-
I hit scan or other commands in ESP32 Wifi Marauder Companion and I get no output or I get a “Press BACK to send stopscan”:
-
If you are using the VoyagerRF WITH the Micro SD card connected:
This happens usually on Flipper’s RogueMaster firmware. Go to GPIO and set 5V on GPIO to ON.
-
If you are using the VoyagerRF WITHOUT the Micro SD card connected:
There is a bug on the Marauder v0.10.4 firmware or companion app. If there is no SD card connected, when booting (entering the ESP32 WiFi Marauder app), the ESP32 will be bugged, you can hit the reset button while being in the app and you can use the module as normal. Everytime you get into the app with no Micro SD card connected to the VoyagerRF, you will have to hit the reset button. I’m trying to work this out.
-
- The micro SD card is connected to the VoyagerRF, but no pcaps are being saved:
Make sure to use 32GB or less MicroSD card, FAT32 file format and NOT to use SanDisk brand (awkward, but the brand counts).
Check the configs.h and make sure that only #define MARAUDER_FLIPPER is uncommented and that you have changed the #define SD_CS 4 as previously described.
Connect the SD card before entering the ESP32 WiFi Marauder app.
- Please, if you have other issues, please, contact me on my email.