

Building a pentest dropbox for fun and (no) profit
10 min read - 05/04/2024 - By Kashmir54
🌊 Kashmir54's "Artemis" Dropbox ⚡
Index
Main
Hands-on
Advance setup and tunning
Introduction
Welcome to a new blog post! In this case we will talk through the process to choose and build a fully functional and automated pentesting dropbox. Hold on, what’s a dropbox? A dropbox is a device which is shipped to clients for internal pentesting tasks. This way, we can connect to the machine remotely and perform any task within client’s office or internal network. A dropbox comes handy in the following scenarios:
-
Perform remote internal pentests: On internal pentests, the objective is to simulate an attacker with access to the internal network (network office, DMZ, etc). This is an important scenario for companies to evaluate their security in depth concept and see how far an attacker can reach when a VPN credential is compromised or if an employee connected a BadUSB into their corporate PC.
-
Get assistance from remote teammates: If you are performing an on-site internal pentest, you could use some help from your teammates and split the workload, for example, in network segments so you can deeply inspect quirky ports or assets.
-
Remote WiFi pentests: You can attach extra WiFi cards to the dropbox and perform a WiFi pentest. In this case you lack movement, and requesting the client to move the dropbox to different areas could be a little annoying.
So, if you are into pentesting and willing to take over any of the previous scenarios, this post is for you. We will cover all the process, from choosing the hardware, to the final stage of connecting and troubleshooting. This is the index for this post:
Hardware
Any of the steps and subject I will explain in this post are flexible, there are many options, tools and settings you can customize to fit a dropbox into your use case. In terms of hardware, there are two things to bear in mind:
-
Price: This will have a direct impact on performance, so if you like heavy lifting, background port/enumeration tools and multitasking, you should consider a good performance device. Price ranges goes from 70€ for a Raspberry Pi 5 up to +800€ for a 1L workstation.
-
Size: It has to be as portable as possible. From my point of view, I won’t go bigger than 1L workstation since you have to send it to the client with a protective box.
Here you have some common choices from the community, from the basic RaspberryPi 5 up to the Zotac Zboxes:

RaspberryPi 5 with CPU cooler (Source: arstechnica.com)

Intel NUC 12 (Credit: Matthew S. Smith, Reviewed)

Zotac Zbox EN1060 (Credit: Mark Walton, Arstechnica.com)

Lenovo ThinkCentre M900 Tiny (Source: Patrick Kennedy, servethehome.com)
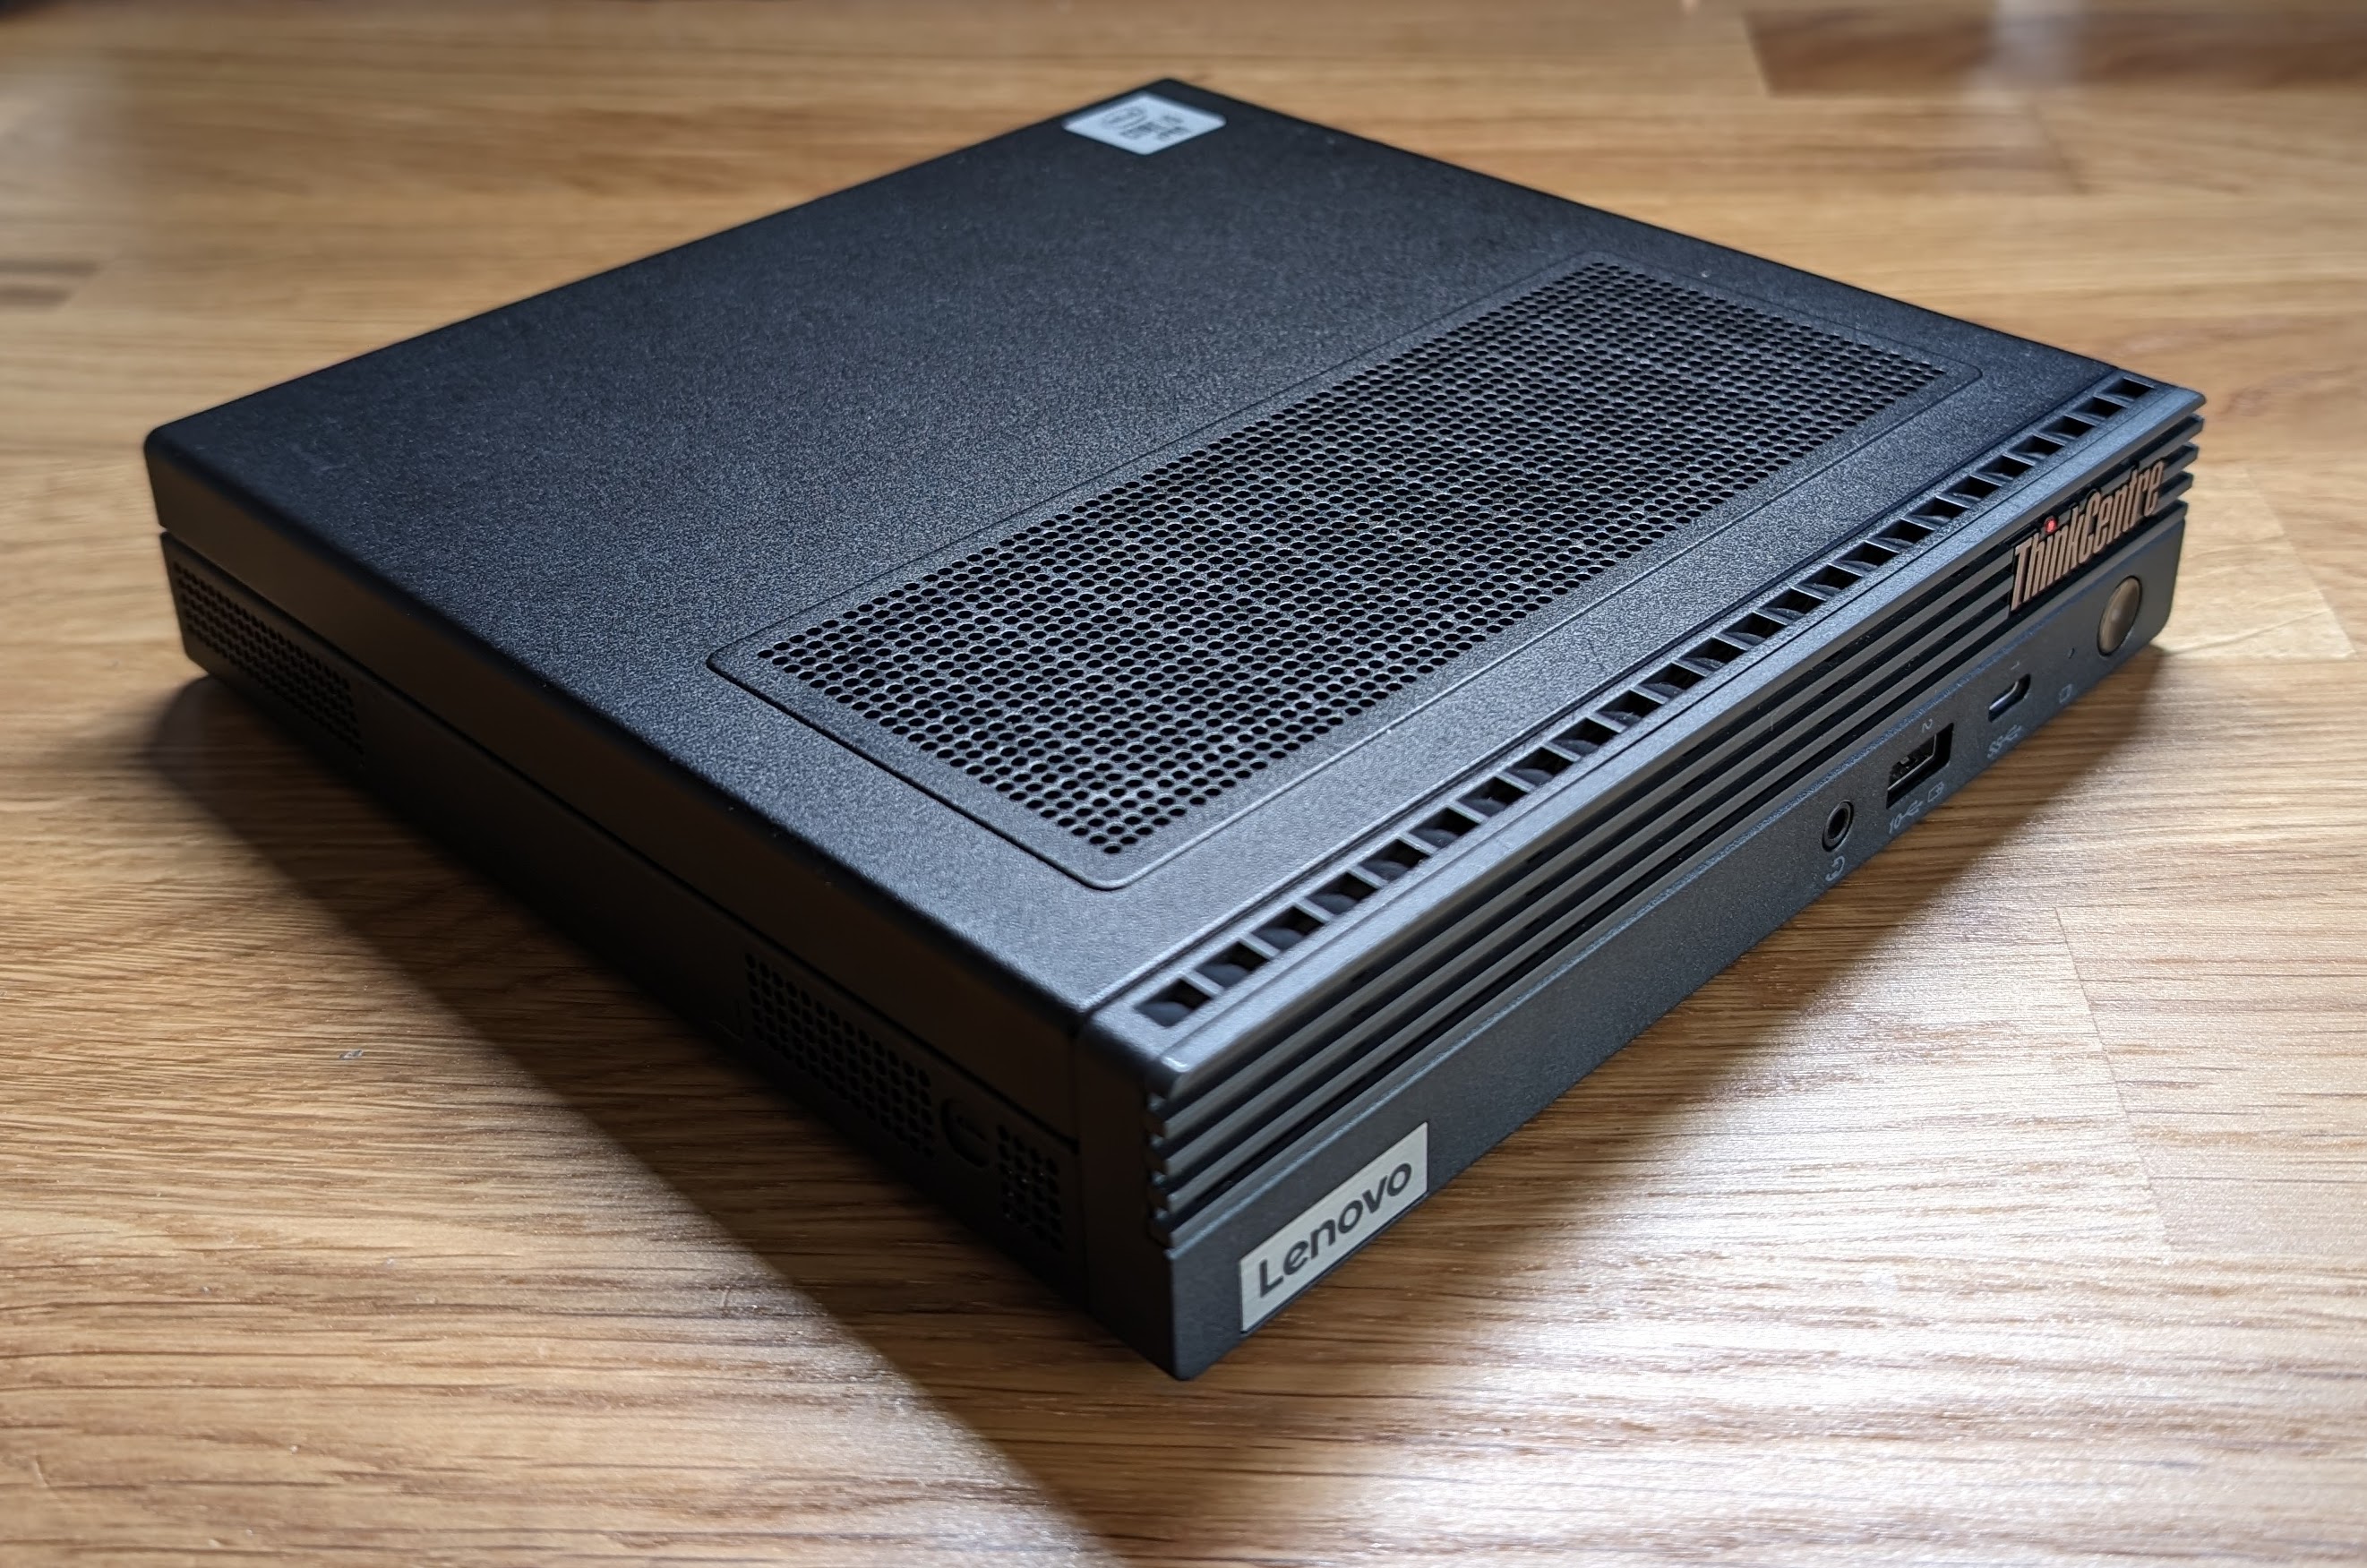
My choice? I like smooth operations, so my choice was a refurbished Lenovo ThinkCentre M90Q featuring: Intel Core i5 10500, 16GB RAM, 256GB NVMe SSD and 1 NIC. I got an awesome deal for it, so no other option could compete for that price. This is a robust build, metal case, upgradeable (extra DIMM RAM slot, 2.5” SSD and extra M.2 slot), 3 x USB 3.2 Gen2, 2 x USB 3.2 Gen1, 1 x USBC 2.3 Gen1… Literally, you have all what’s needed.
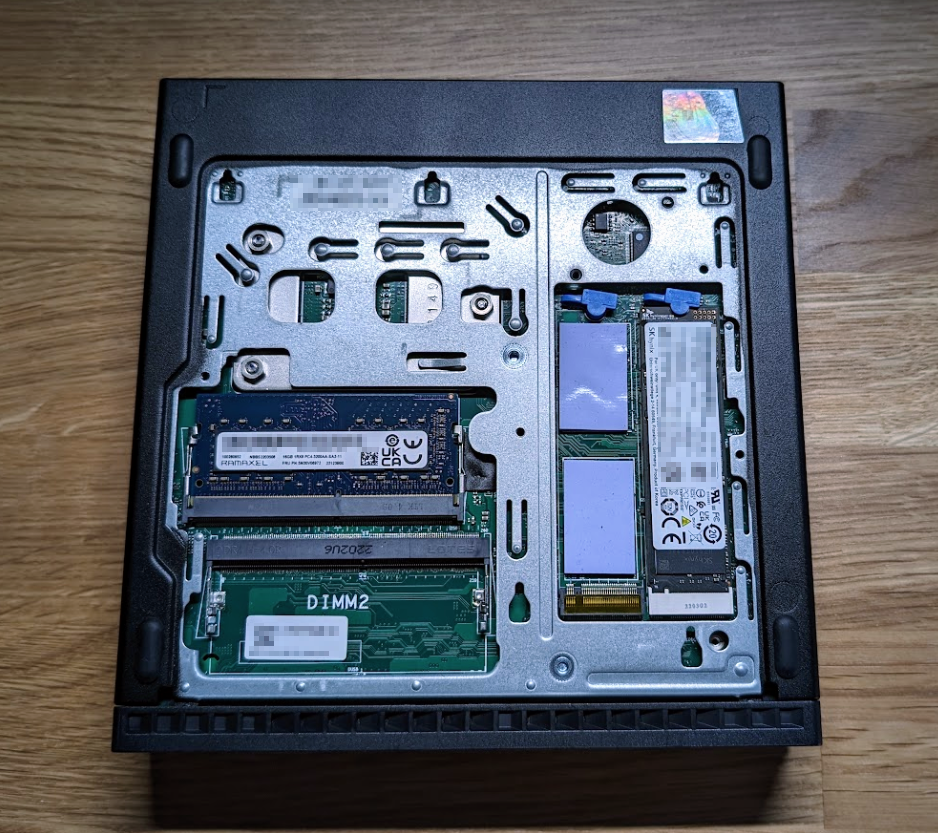
Bottom part with an extra DIMM RAM and M.2 slot

Upper part, with the CPU Cooler and space to fit a 2.5" SSD
An extra picture of the top and front:
Front with audio jack, USBC and USB 3.2 Gen2

Back with the rest of the ports and power supply
Software
We have our device, now it’s time to choose our platform. I have seen two options:
- Windows: Connect with RDP and use a Kali VM (less common).
- Kali Linux: Just embrace responsiveness ⚡
In this post, I will cover the Kali Linux option since it’s a pleasure to work with it and to automate things, plus, I don’t find the Windows option useful. If you need to develop an exploit or a script, you can do so locally and transfer it to the dropbox.
Later, we will set up an Ubuntu server to host our OpenVPN server with a static IP address. There are other options to dynamically set the callback IP address, but that’s out of scope for this post.
For the tools, we will be using OpenVPN as for the VPN server and clients, xrdp if we choose to connect to a remote desktop in the dropbox, and OpenSSH to initiate an SSH session on the box.
Architecture
Let’s take a quick look at the network architecture for a dropbox. Again, here you have several options and the choices depends on the assessment. In case you are dropped into an unreachable area (air gapped, firewalls, WiFi assessment on offices with no Ethernet connections, etc) you will need an LTE/4G/5G USB with a SIM card to get the callback. In the other hand, if the VPN outbound port is allowed + you can access the VPN server from within, then you won’t need additional hardware. Eitherway, the network concept (depicted in the next figure) is the same for both scenarios:

Dropbox network diagram
The steps are:
- We connect to the VPN server.
- The dropbox is powered on and automatically connects to the VPN.
- We use SSH or RDP to connect to the dropbox.
With all these things in mind, let’s dive into the setup and configuration.
Hands-on
OpenVPN Server Setup
For the OpenVPN server I will be using DigitalOcean. For sure, you can use any other cloud, AWS, Azure, GCP, etc… the configuration remains the same. Now I spawn a Droplet (or an EC2 on AWS, Azure Virtual Machines, etc) with low requirements for the sake of the example, you can adapt the network bandwidth and CPU cores, but by the time I’m writing this blog, I didn’t experience any difference in performance between CPU/RAM specs. I chose Ubuntu 22.04 LTS, 1 Core, 1 GB Ram, 25GB disk and 1000GB Network bandwidth.
Apologies for the white screenshots; unfortunately, the website does not offer a dark mode.

Digital Ocean droplet configuration
Once created, set up the firewall, allowing port SSH for configuration and the UDP on 1194 for the VPN (for the SSH, whitelist your public IP address to avoid exposing the port to all the internet):
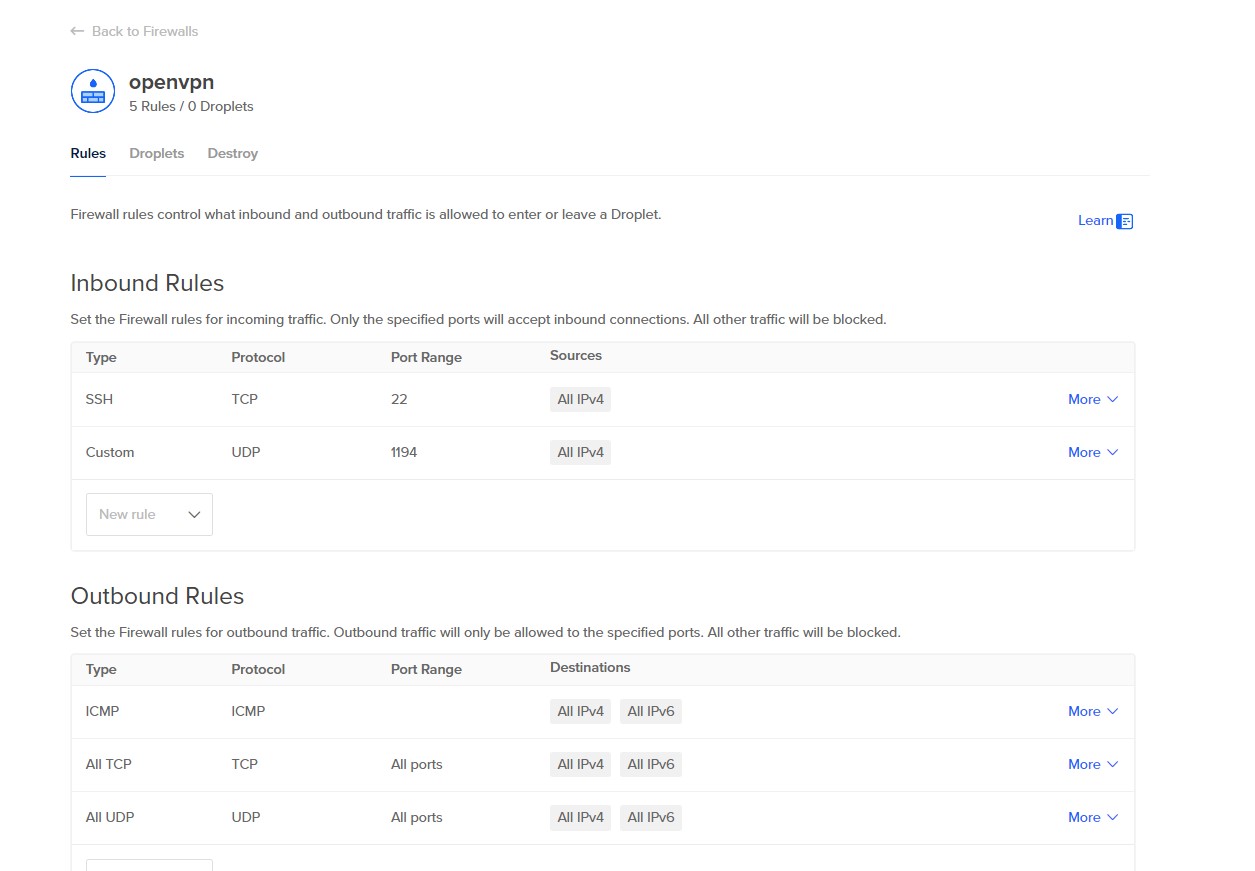
Digital Ocean droplet configuration
Once we get the IP address, we are ready to connect via SSH and setup OpenVPN. I like to use Nyr’s script. Download it and run it as depicted in the following snippet:
# Download and change the permissions of the script:
wget https://git.io/vpn -O vpn.sh
chmod +x vpn.sh

# Execute the script
./vpn.sh

# The script starts and you gotta answer the different options:
Welcome to this OpenVPN road warrior installer!

Which IPv4 address should be used?
     1) 46.101.120.171
     2) 10.19.0.5
     3) 10.114.0.2
IPv4 address [1]: 1 # Select your public IP

Which protocol should OpenVPN use?
   1) UDP (recommended)
   2) TCP
Protocol [1]: 1

What port should OpenVPN listen to?
Port [1194]:  # Hit enter to keep the default option 1194

Select a DNS server for the clients:
   1) Current system resolvers
   2) Google
   3) 1.1.1.1
   4) OpenDNS
   5) Quad9
   6) AdGuard
DNS server [1]: 2

Enter a name for the first client:
Name [client]: artemis # The dropbox name to locate its ovpn file

OpenVPN installation is ready to begin.
Press any key to continue...

# Snip

Finished!

The client configuration is available in: /root/artemis.ovpn
New clients can be added by running this script again.

# Once ready, retrieve the generated ovpn file
cat artemis.ovpn
	client
	dev tun
	proto udp
	remote 46.101.120.171 1194
	resolv-retry infinite
	nobind
	persist-key
	persist-tun
	remote-cert-tls server
	auth SHA512
	ignore-unknown-option block-outside-dns
	verb 3
	<ca>
	-----BEGIN CERTIFICATE-----
	MIIDSzCCAjOg
	# Snip
We have the dropbox (I call it artemis) ovpn file ready, now, let’s set up another ovpn file for the pentester to connect to the VPN:
# Run again the setup script
./vpn.sh

# The script starts:
OpenVPN is already installed.

Select an option:
   1) Add a new client
   2) Revoke an existing client
   3) Remove OpenVPN
   4) Exit
Option: 1

Provide a name for the client:
Name: pentester
No Easy-RSA 'vars' configuration file exists!
# Snip

pentester added. Configuration available in: /root/pentester.ovpn
We are done with the OpenVPN server, download both ovpn files and turn on your dropbox.
Dropbox setup
In your main computer, create a file called setup_dropbox.sh and copy the following script. This will install xrdp and set up OpenVPN to start on boot (both). It also includes a command to prevent the computer from entering sleep or hibernation mode during idle. Make sure to change the line 6 with the name of your OpenVPN file:
setup_dropbox.sh
#!/bin/sh
# Run as sudo

# Copy the openvpn file to automatically connect on boot
echo "[+] Setting OpenVPN connect on boot"
cp artemis.ovpn /etc/openvpn/openvpn.conf

# Avoid systend and hibernation in linux
systemctl mask sleep.target suspend.target hibernate.target hybrid-sleep.target

# xrdp configuration
echo "[+] Installing xrdp (this will take a while)"
apt-get install -y xrdp

# Enable xrdp and openvpn on start
echo "[+] Enable xrdp and OpenVPN on boot"
service xrdp start
service xrdp-sesman start
systemctl enable xrdp --now
systemctl enable openvpn
Copy both files (dropbox ovpn and setup script) to a USB and plug it into the dropbox. Once in the dropbox, run the setup script (make sure to set execute permissions over the script:

Setup script output
Now, reboot your dropbox, and you will see that it is automatically connected to the OpenVPN server on boot:

Dropbox connected to the VPN
Connect to the dropbox as a pentester
We are ready to use our dropbox via VPN. Make sure to logout from the dropbox, as one user can’t be used simultaniously (local session + rdp session). You might want to create another user specifically for the pentest. Enough talking, let’s connect to the VPN with the pentester.ovpn file we generated:
ll
total 20
-rw-r--r-- 1 kali kali 4976 Apr  4 20:56 artemis.ovpn
-rw-r--r-- 1 kali kali 4980 Apr  4 21:30 pentester.ovpn

# Start the VPN client
sudo openvpn pentester.ovpn
Once connected, we can check the new tun0 interface with the VPN:

OpenVPN client connected to the server
Now, open Remmina or your handy RDP client and insert the dropbox IP within the VPN (10.8.0.2) and the username, then connect:
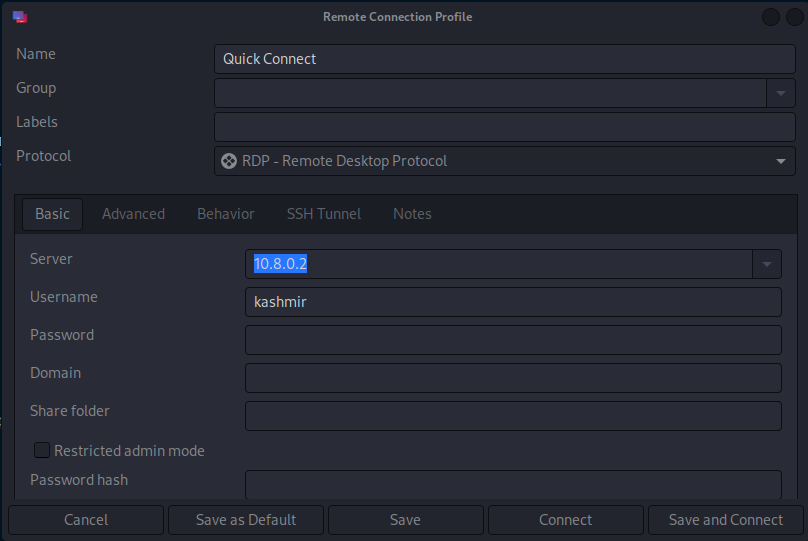
Remmina setup
Hit save and connect and the RDP login will pop up:

RDP Login
Once logged in, we are in the dropbox ready to rock and roll:

Dropbox up and running
And that’s it, we have a basic setup in the dropbox. You can shutdown the dropbox and start it whenever you need, it will automatically connect to the VPN and once it’s ready you can connect as shown in those last steps, no need to take any action on the dropbox, just power on ⚡
Advance setup and tunning
Up until here, you can use the dropbox with no issues, but in this section I will go through some settings to keep your operations as smooth and robust as possible.
Enhance RDP responsiveness
You might feel the RDP a little laggy, that is due to the VPN connection and the different encryption layers involved in the process. If you set up RDP with a strong encryption level you might experience some slowdowns. If you just finished this tutorial and you are not comfortable with responsiveness, try the following settings in the xrdp.ini file:
/etc/xrdp/xrdp.ini
max_bpp=16
xserverbpp=16
use_compression=yes
crypt_level=low

# This made the real deal
tcp_send_buffer_bytes=4194304
If you set the new buffer bytes, make sure to run the following command:
sudo sysctl -w net.core.wmem_max=8388608
Last but now least, configure your RDP client with the Color Depth to “GFX RFX” and the Network Connection Type to “Low performance broadband”:

Remmina RDP client settings
Now your screen should be a lot smoother. If you still have issues, you could explore more options, making OpenVPN configurations lighter in terms of encryption protocols. You are the one in charge of cybersecurity, you know what that means 😉. Other option is to set SSH with Public Key, I configured the SSH to have a backup door to get in the dropbox, in case I mess up the RDP sessions or the xrdp hangs up.
WiFi setup
Bear in mind that if you want to perform WiFi pentests, you will need a NIC with packet injection capabilities in your dropbox. In my case, I planned to go with the allmighty ALFA Network AWUS036ACM dual band WiFi adapter, really convenient and reliable (plus in-kernel drivers support). With the dropbox model I chose, I had no problem fitting the ALFAs without a USB splitter:
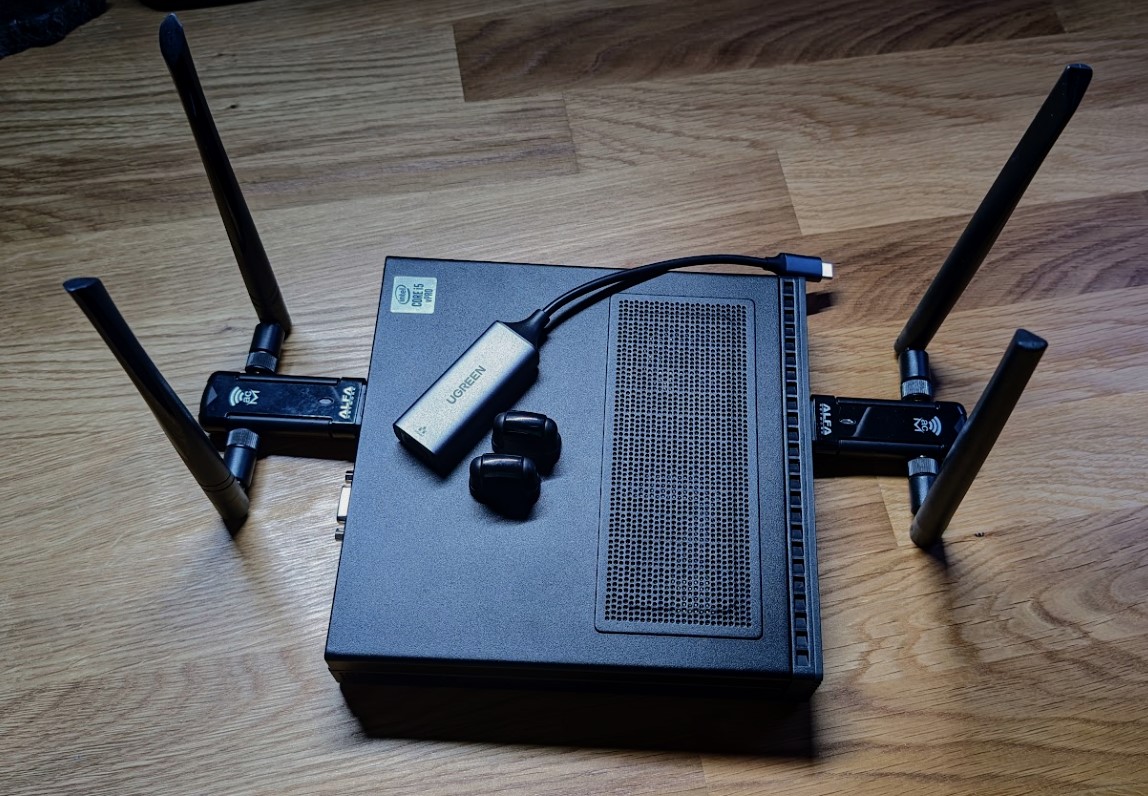
Dual AWUS036ACM connected
As these Wi-Fi adapters have in-kernel drivers, once you connect them you are good to go, you can check if they are working with the iw dev command:

Dual AWUS036ACM connected and ready for action
That’s all for this post, I hope it was useful and that you liked it. I might update this post when I find some interesting stuff worth sharing, until then, thanks for reading and keep exploring!
Kashmir54 🌊⚡